
Skill Collecting: How to Make Your Own Maple Syrup - Part 1

Making stuff is great. Not only is it a real-world outlet to unplug from media and be a Digital Minimalist, but it’s keeps you active and it’s something you can get your kids involved with so their life skills can include more than just unlocking all the levels on Lego Star Wars.
If you have even just a few maple trees, you can make your own real maple syrup. And if all your earliest memories of pancakes only include Aunt Jemima, then I might just have to insist you try this. Just don’t blog about it while you’re outside managing the process. My fingers are freezing. True story.
Many commercially available syrups are actually just High Fructose Corn Syrup with maple flavoring added. I went my whole life never noticing that on the bottle it doesn’t say “Maple Syrup” but rather “Maple Flavored Syrup”.
We’ve been making our own syrup for four years. Below, I’ll show you how we got started with it “on the cheap”. This is certainly not the only way, so hopefully it will give you some ideas.
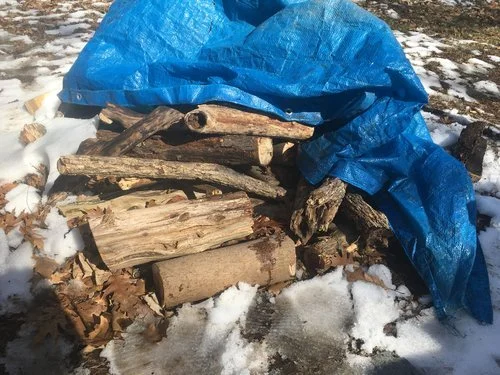
First, you’ll want to gather some dry wood and make sure to get enough. You don’t want to run out in the middle of the process. We have a few acres of woods so just gathering the dead stuff is plenty for our small operation. Oh, and carry an ax. It just feels right.
Next, you’ll need an evaporator. Professional evaporators are rather expensive, even used ones. So, I improvised. I had an old file cabinet in the basement. I removed the drawers. Then, I laid it on it’s back and cut a door in one end. Then, I just screwed on some hinges and latch. On the other end, I cut a hole and screwed on a duct piece with an elbow and four or five foot rise to work as a smoke stack. This can be cheap ducting and doesn’t have to be the expensive double-walled stuff.
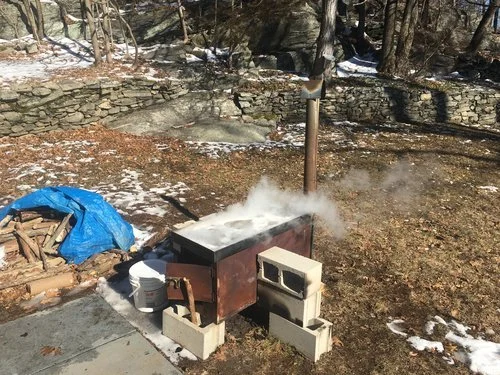
The homemade syrup evaporator
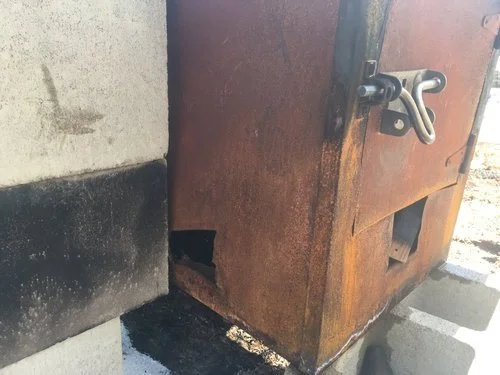
The front door with air holes beneath.
On the inside, I bolted some angle iron on each side down to long axis of the cabinet several inches up from the bottom. These are used to support a grill so the fire can be built up from the bottom.
That space underneath the grill is for air movement. You can also then cut holes in cabinet below the level of the grill so it will pull air through. I’ve thought about adding a blower but so far it’s done well without one.
Before you ever use the evaporator for syrup production, you’ll want to build a massive fire in it to burn off the paint. Any fumes from the galvanized smoke stack should burn off too.
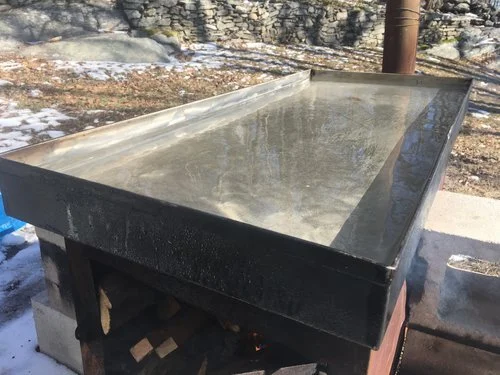
You’ll also want to get a stainless steel pan. Yes, it must be stainless. I got this one for $40 from a used restaurant supply store. I think it was originally used for cheesecakes. You also want it to be big enough to cover the entire opening of the cabinet, er…evaporator. You don’t want too much smoke getting out of the top because it can make the finished syrup taste smokey. Then you’ll try to like it because you worked so hard but in the end you’ll pitch it because it’s just awful. Ask me how I know.
Now, that you’ve got your equipment set up, you’ll need to tap your trees. If you don’t know how to identify a maple tree by it’s bark then you’re “out of luck” because maple sugar season usually starts in the middle of February and there are no leaves. The way around this is to mark your maple trees in summer. The leaves are pretty easy to identify. You can make syrup from Red Maple, Silver Maple, and of course, Sugar Maple which usually has the most sugar content.
These buckets are especially designed for this purpose and you’ll also need a lid, a hook, and a thing called a spile, which is basically a spigot or spout that you hammer into the tree. You’ll need to drill a 3/8” hole first, usually at a very slight upward angle. You’ve got to keep everything as clean as you can during the process to avoid mildew and unpleasant flavors.
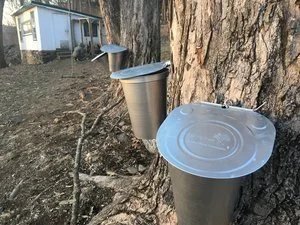
We have six “taps” total.
The spile, hook, bucket and lid.
Sap storage can be a problem, especially in the height of sap season. You can’t just use an old spackle bucket. You need something food safe preferably. Here’s a tip: If you go to your local bakery, you can ask for empty frosting buckets. Often, they’ll have several (with lids) that they’ve recently emptied. They’ll likely just give them to you.
When you think of sap, you often think of something like pine sap- sticky and thick. Maple sap, however, looks just like water. In fact, it mostly is just water. You’ll need forty gallons of it to produce one gallon of syrup. The other thirty-nine gallons just gets boiled off. There are fancy, reverse-osmosis filtration systems that can give you a good head start with removing water but they’re expensive. Even the DIY ones are around $350 just for materials. You’ll want to skim out bugs before you boil too. Cheesecloth works well for that.
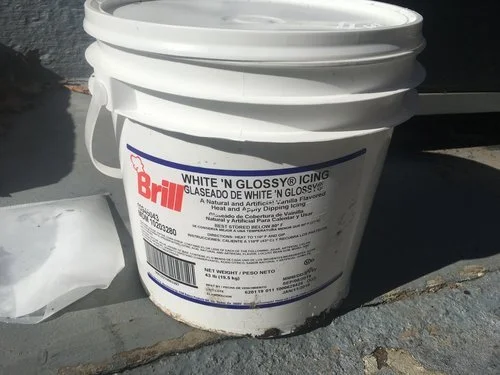
You can often get free, food-safe buckets at bakeries.

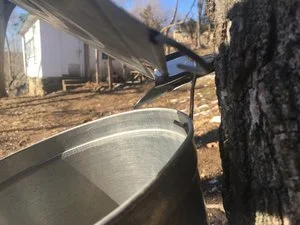
Maple sap looks and feels like water.
Once you’ve got a good heat going, the sap will slowly come to a boil. If it doesn’t, you’re likely not getting enough air to the fire. Opening the door can fix that, but don’t open it too much. You don’t want the syrup to be smokey. You definitely don’t want the pan to boil dry either, on any part of it. So, making sure the whole set up is level is important. Also, keep an eye on it when it gets low.
When the sap is boiled most of the way down, I use a pair of old welding gloves to carefully pour the sap out of the corner of the pan into a stainless steel pot. Yes, it is as sketchy as it sounds. From there, it’s on to finishing the syrup indoors which I’ll cover in part two.
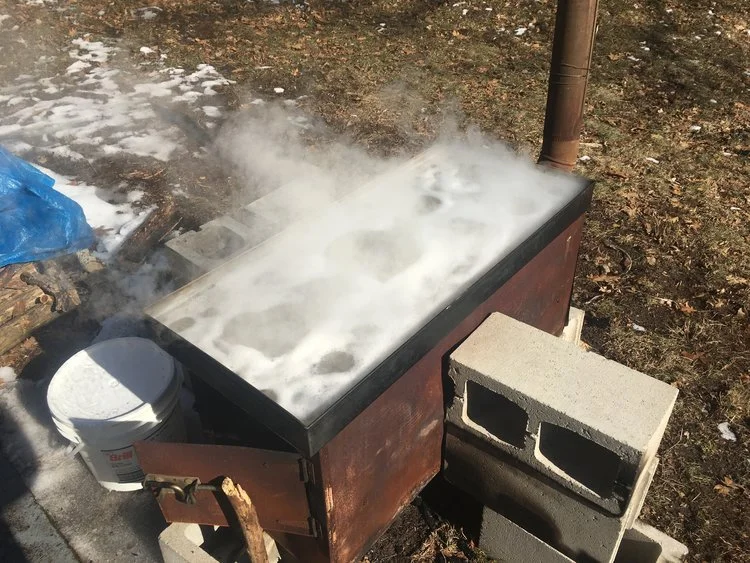
Keeping a rolling boil takes some effort.
This article was transferred from my previous site. Here are what others said at the time of the original writing…
“Nice! We did this last year. We gathered i think it was over 200 gallons and boiled down and had just over 3 gallons I think it was. I will agree this syrup is lightyears ahead of store bought! It was incredible, and since we don't use a ton too often, we just finally used it up at the end of the year (we split half with the inlaws). Not sure if I'll have time to do it this season, which is just about upon us here in MI.” - Roger
- Roger
“Thanks for sharing! Curious if you notice any difference between what you make and what you can buy from a big producer. We've never quite got the same taste, but we like it nonetheless!” - Justin
“It must be our trees because they make incredible syrup. Storebought doesn't come close IMO. Ours are sugar maples. Seems I've heard their flavor is a little better than Red or Silver Maples.” - Thomas