Skill Collecting: How to Make Segmented Wood Turnings
Woodturning is its own category of woodworking. It’s pretty different if you’ve never done it. I’ve been doing wood turnings for about fourteen years now and I’ve made everything from simple pens, to coffee tumblers, baseball bats, table legs, table tops, hollow forms, and bowls.
It’s a fun process, and many who try it become quickly hooked.
I recently made a bowl that was part of a basket auction to benefit a woman with Lymphoma, and documented the key points of process, step-by-step. I did not include the process of wood stock preparation because for this one I’m going to assume you know how to do that. If you don’t, well, it involves a jointer, a planer, and wood.

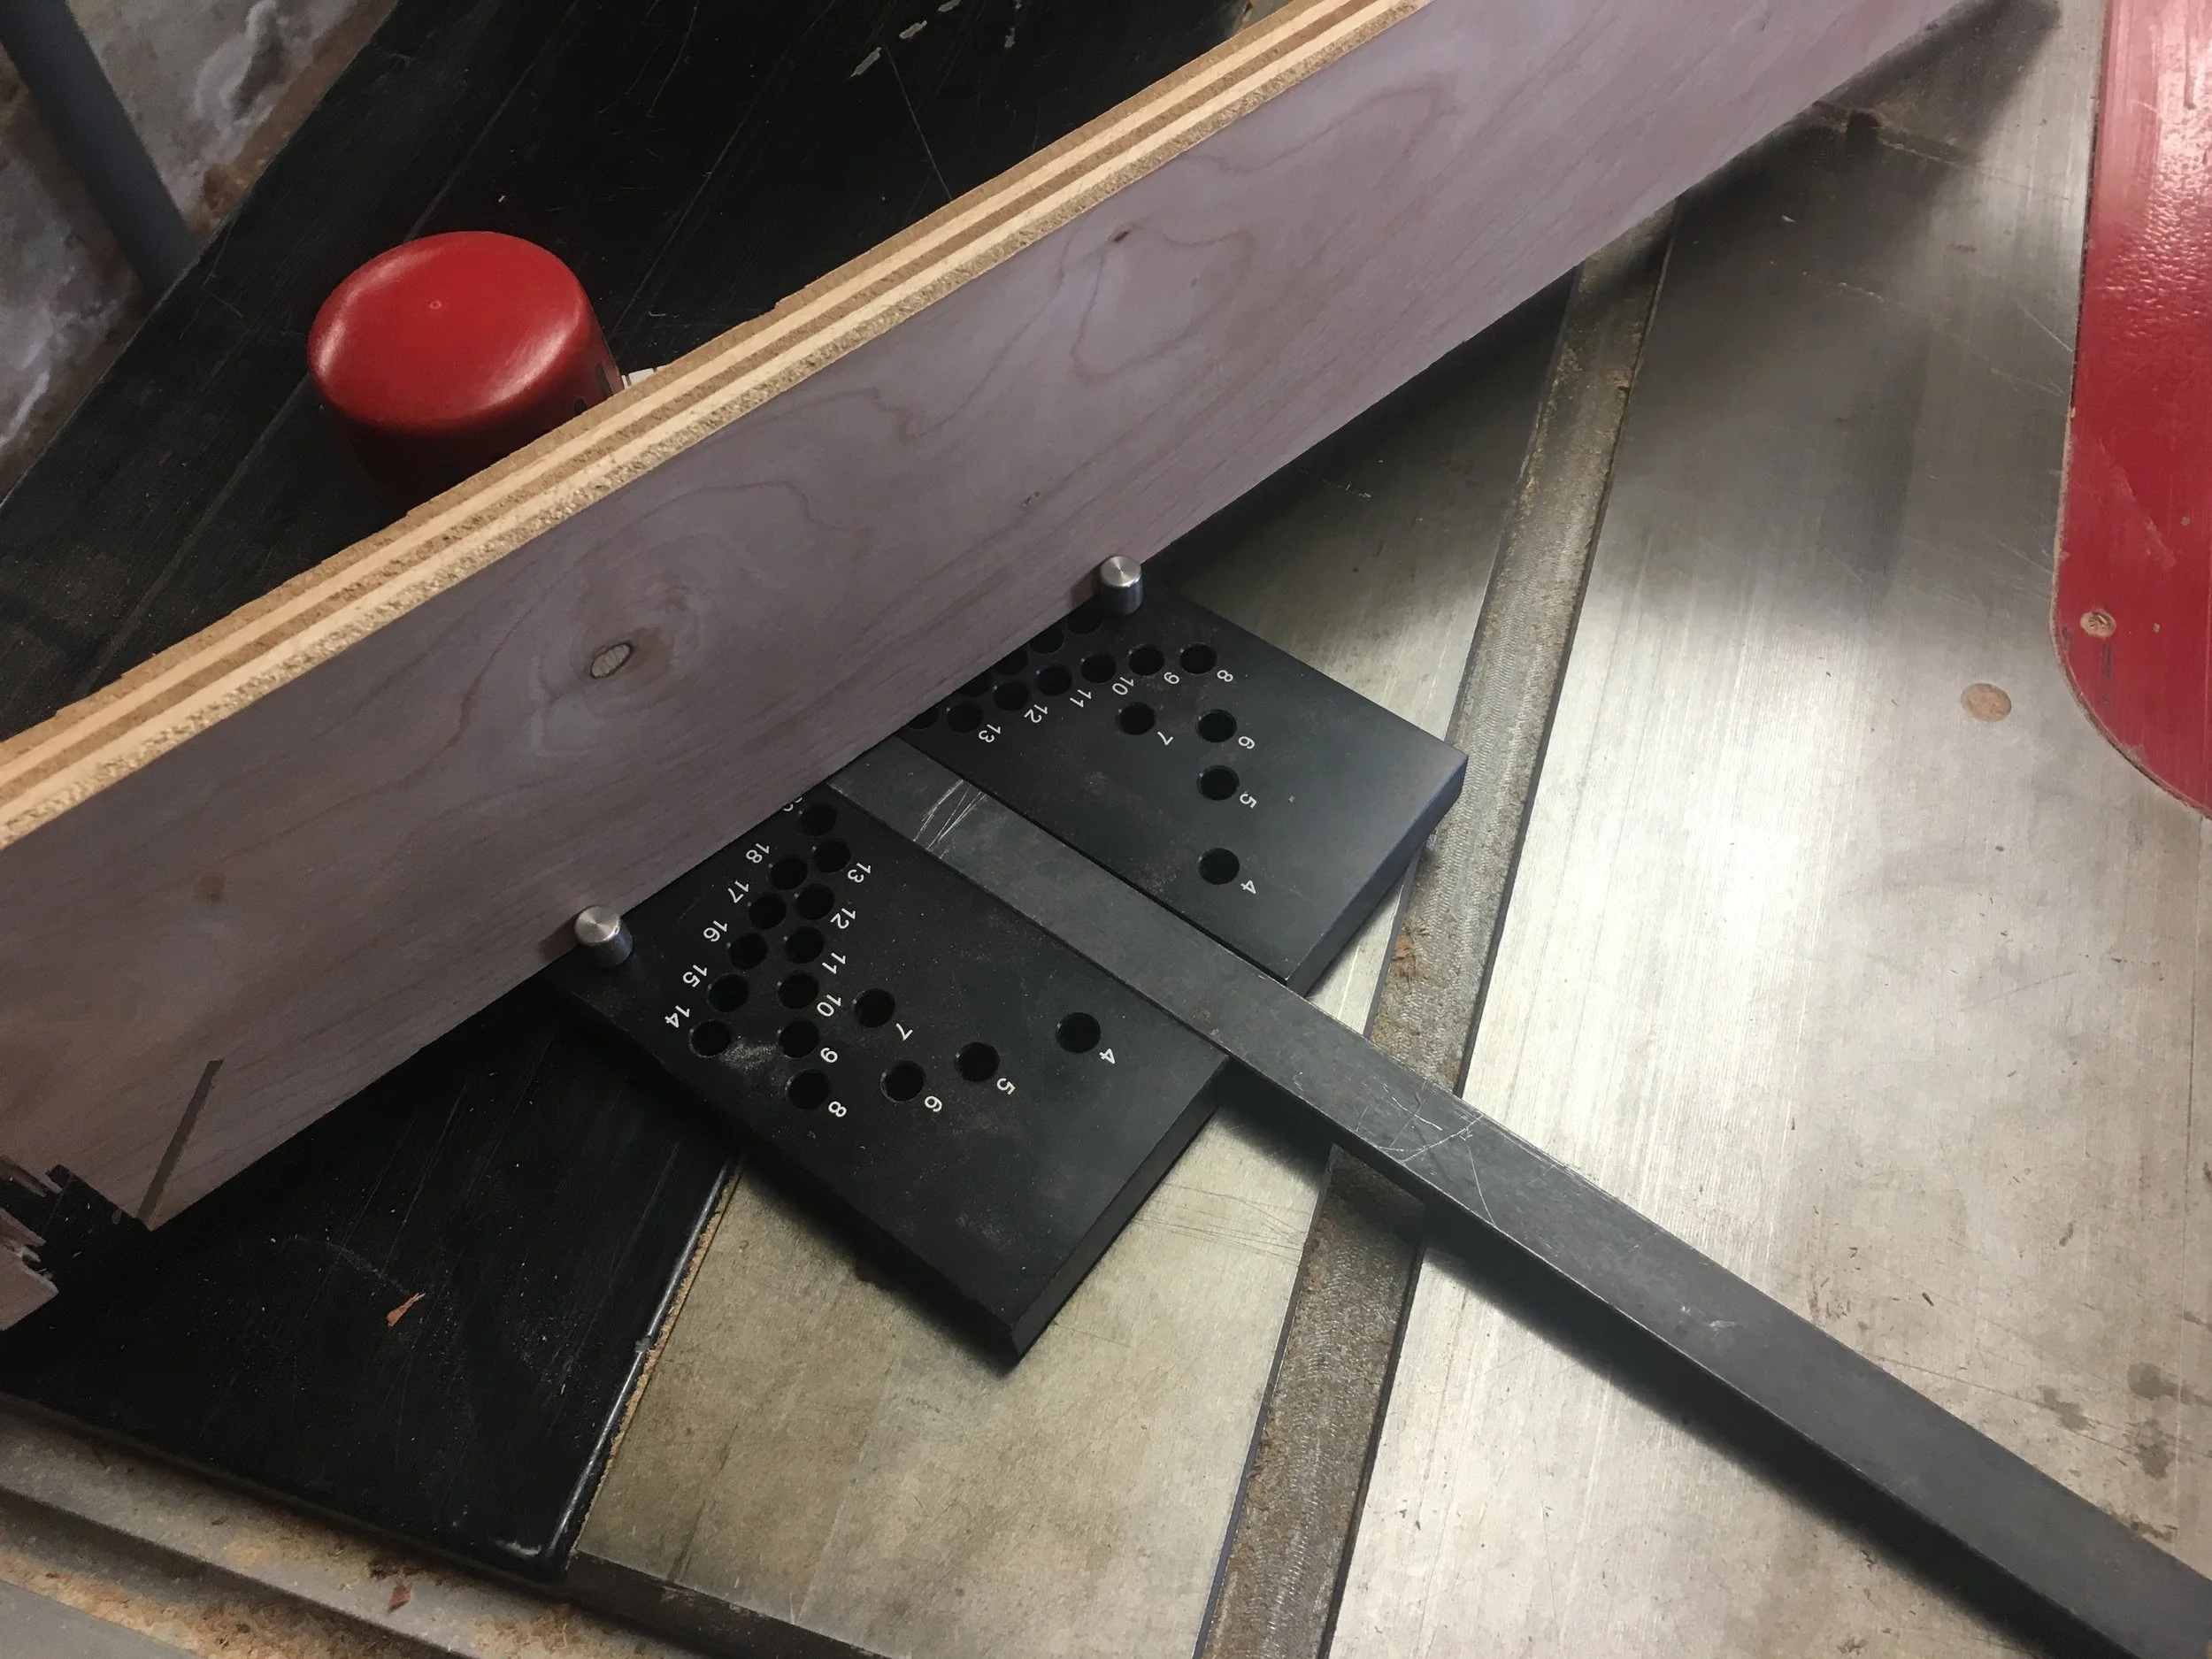
The process begins with this amazing tool. This is called MiterSet. There are two versions of MiterSet, one for standard miters, and the other for making segmented rings like for a turned bowl (pictured left).
Miters of any kind on the table saw have always been fussy if you’re using the supplied miter fence. MiterSet takes all the mystery out of it. You can one here, and it helps me out a little too.
This is how you use MiterSet to set up for cutting repeated segments. Just select the number of segments you want with one pin, and set the other pin to “00”. Set the fence to the pins, and viola!
I’m not bothering to show the stock prep here, but I’m presuming if your preparing to turn a bowl you’re no first timer when it comes to stock prep.
You then just have to make your repeated cuts using a stop block to get equal length pieces.

So, now you should have a bunch of wood chunks that look like this. You can see I laid them end to end on a strip of painters tape and stuck them down.
You can play around with different lengths to get different circumferences in the rings.
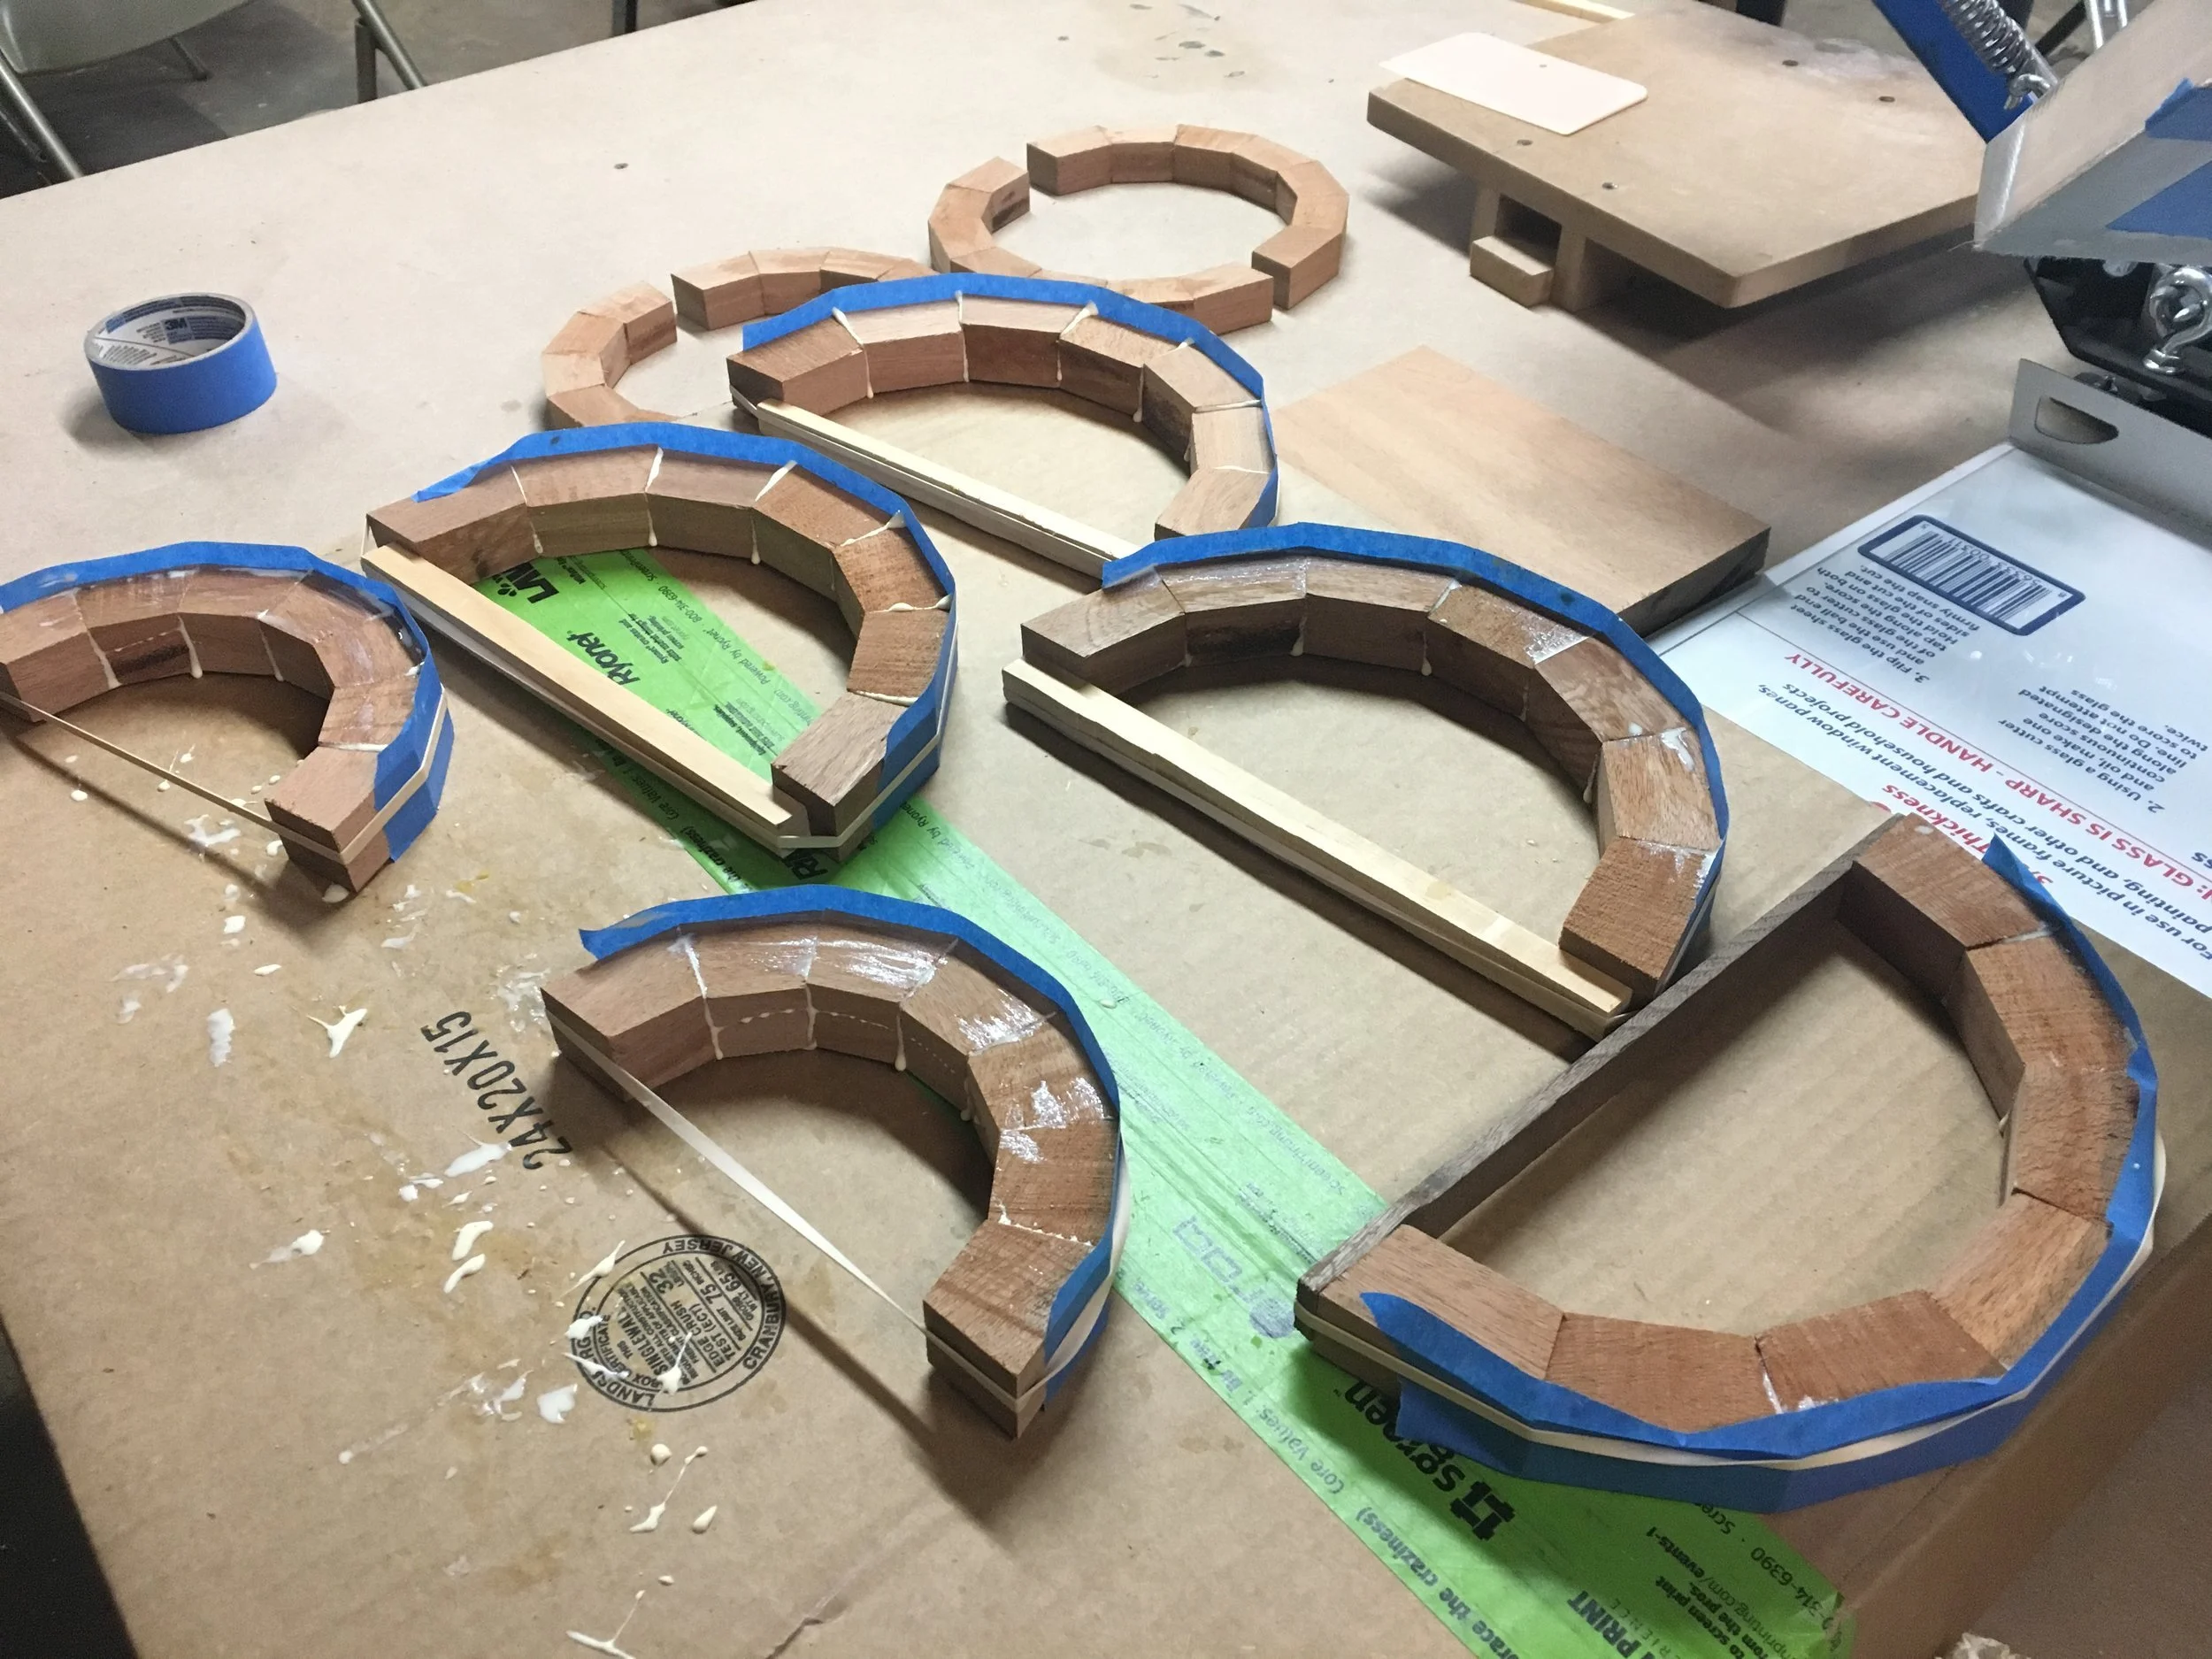
Now you can see why I used the tape. I spread glue on each mating surface and just curled them up. I was careful not to put glue on the end pieces.
I only glued them up in half circles because just to be on the safe side. You’ll see what I mean by that next.
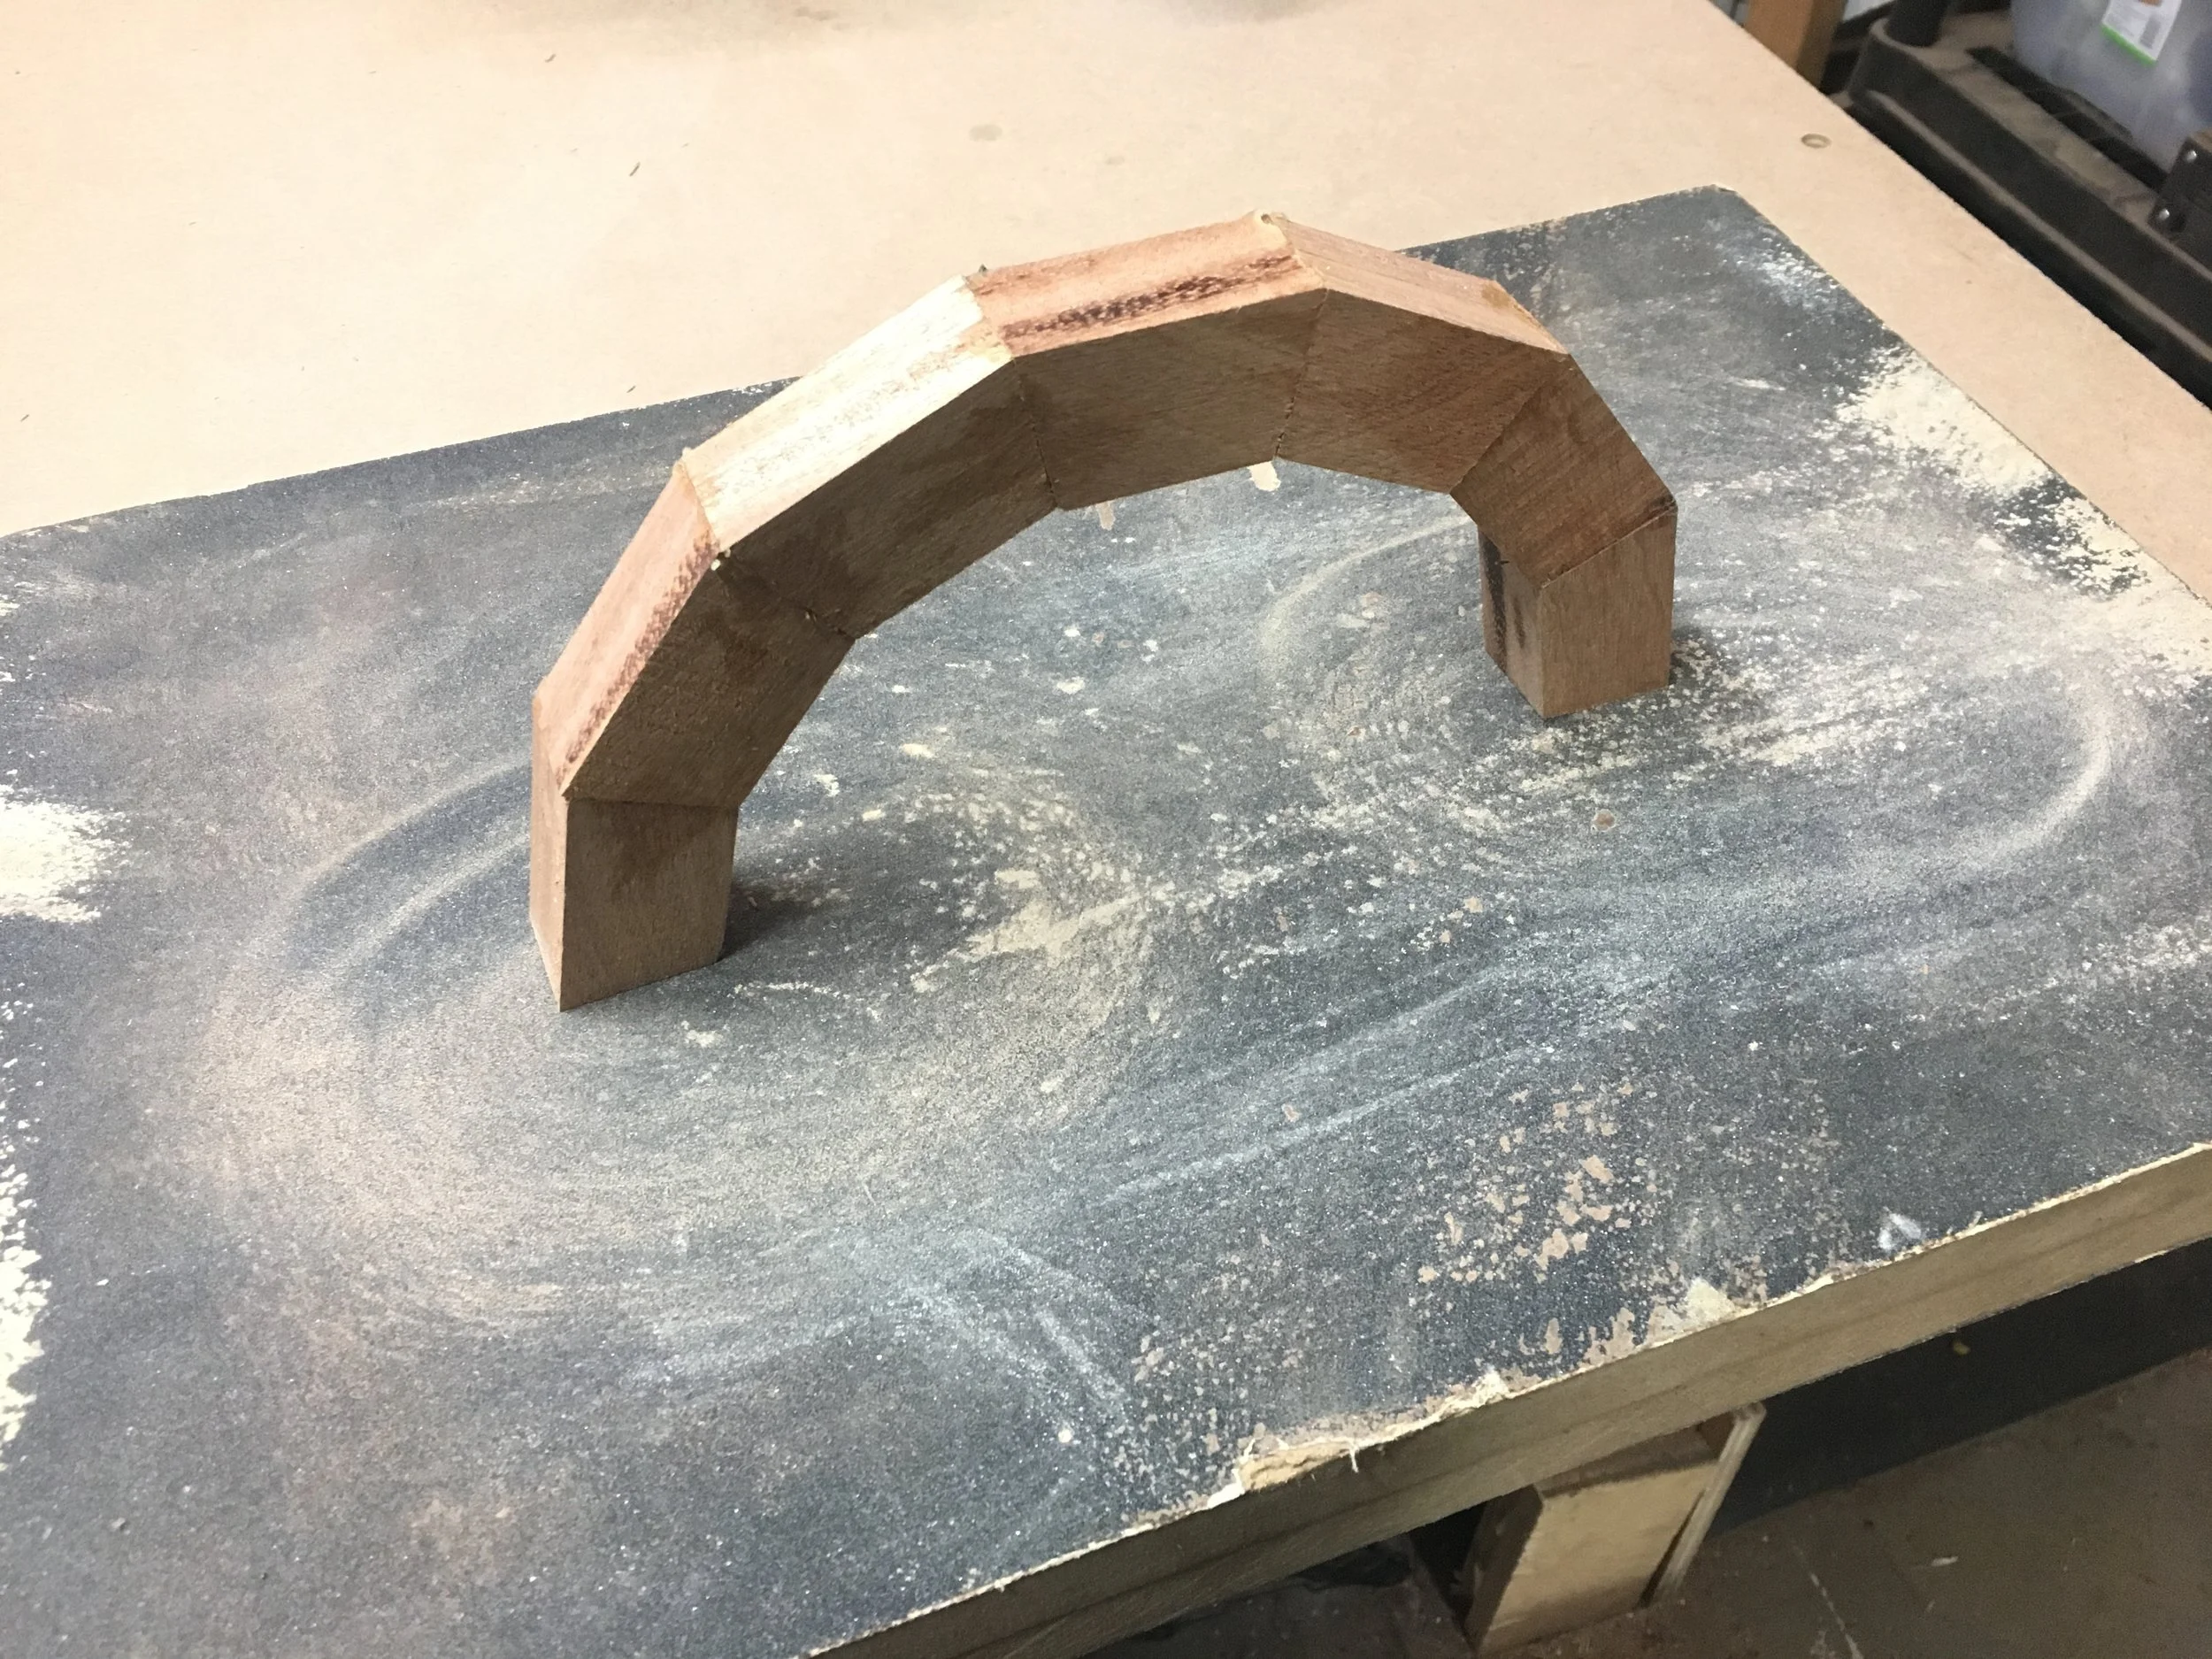
Sometimes, slight variations in the pieces makes one, and only one joint in the circle not quite perfect. It happens to me because I think my saw arbor has a tiny wobble and it makes the blade deflect on some cuts and less on others. I’m talking thousandths of an inch.
Having them in half circles allows you to flatten the halves to get the final joints perfect and fix those slight variations.
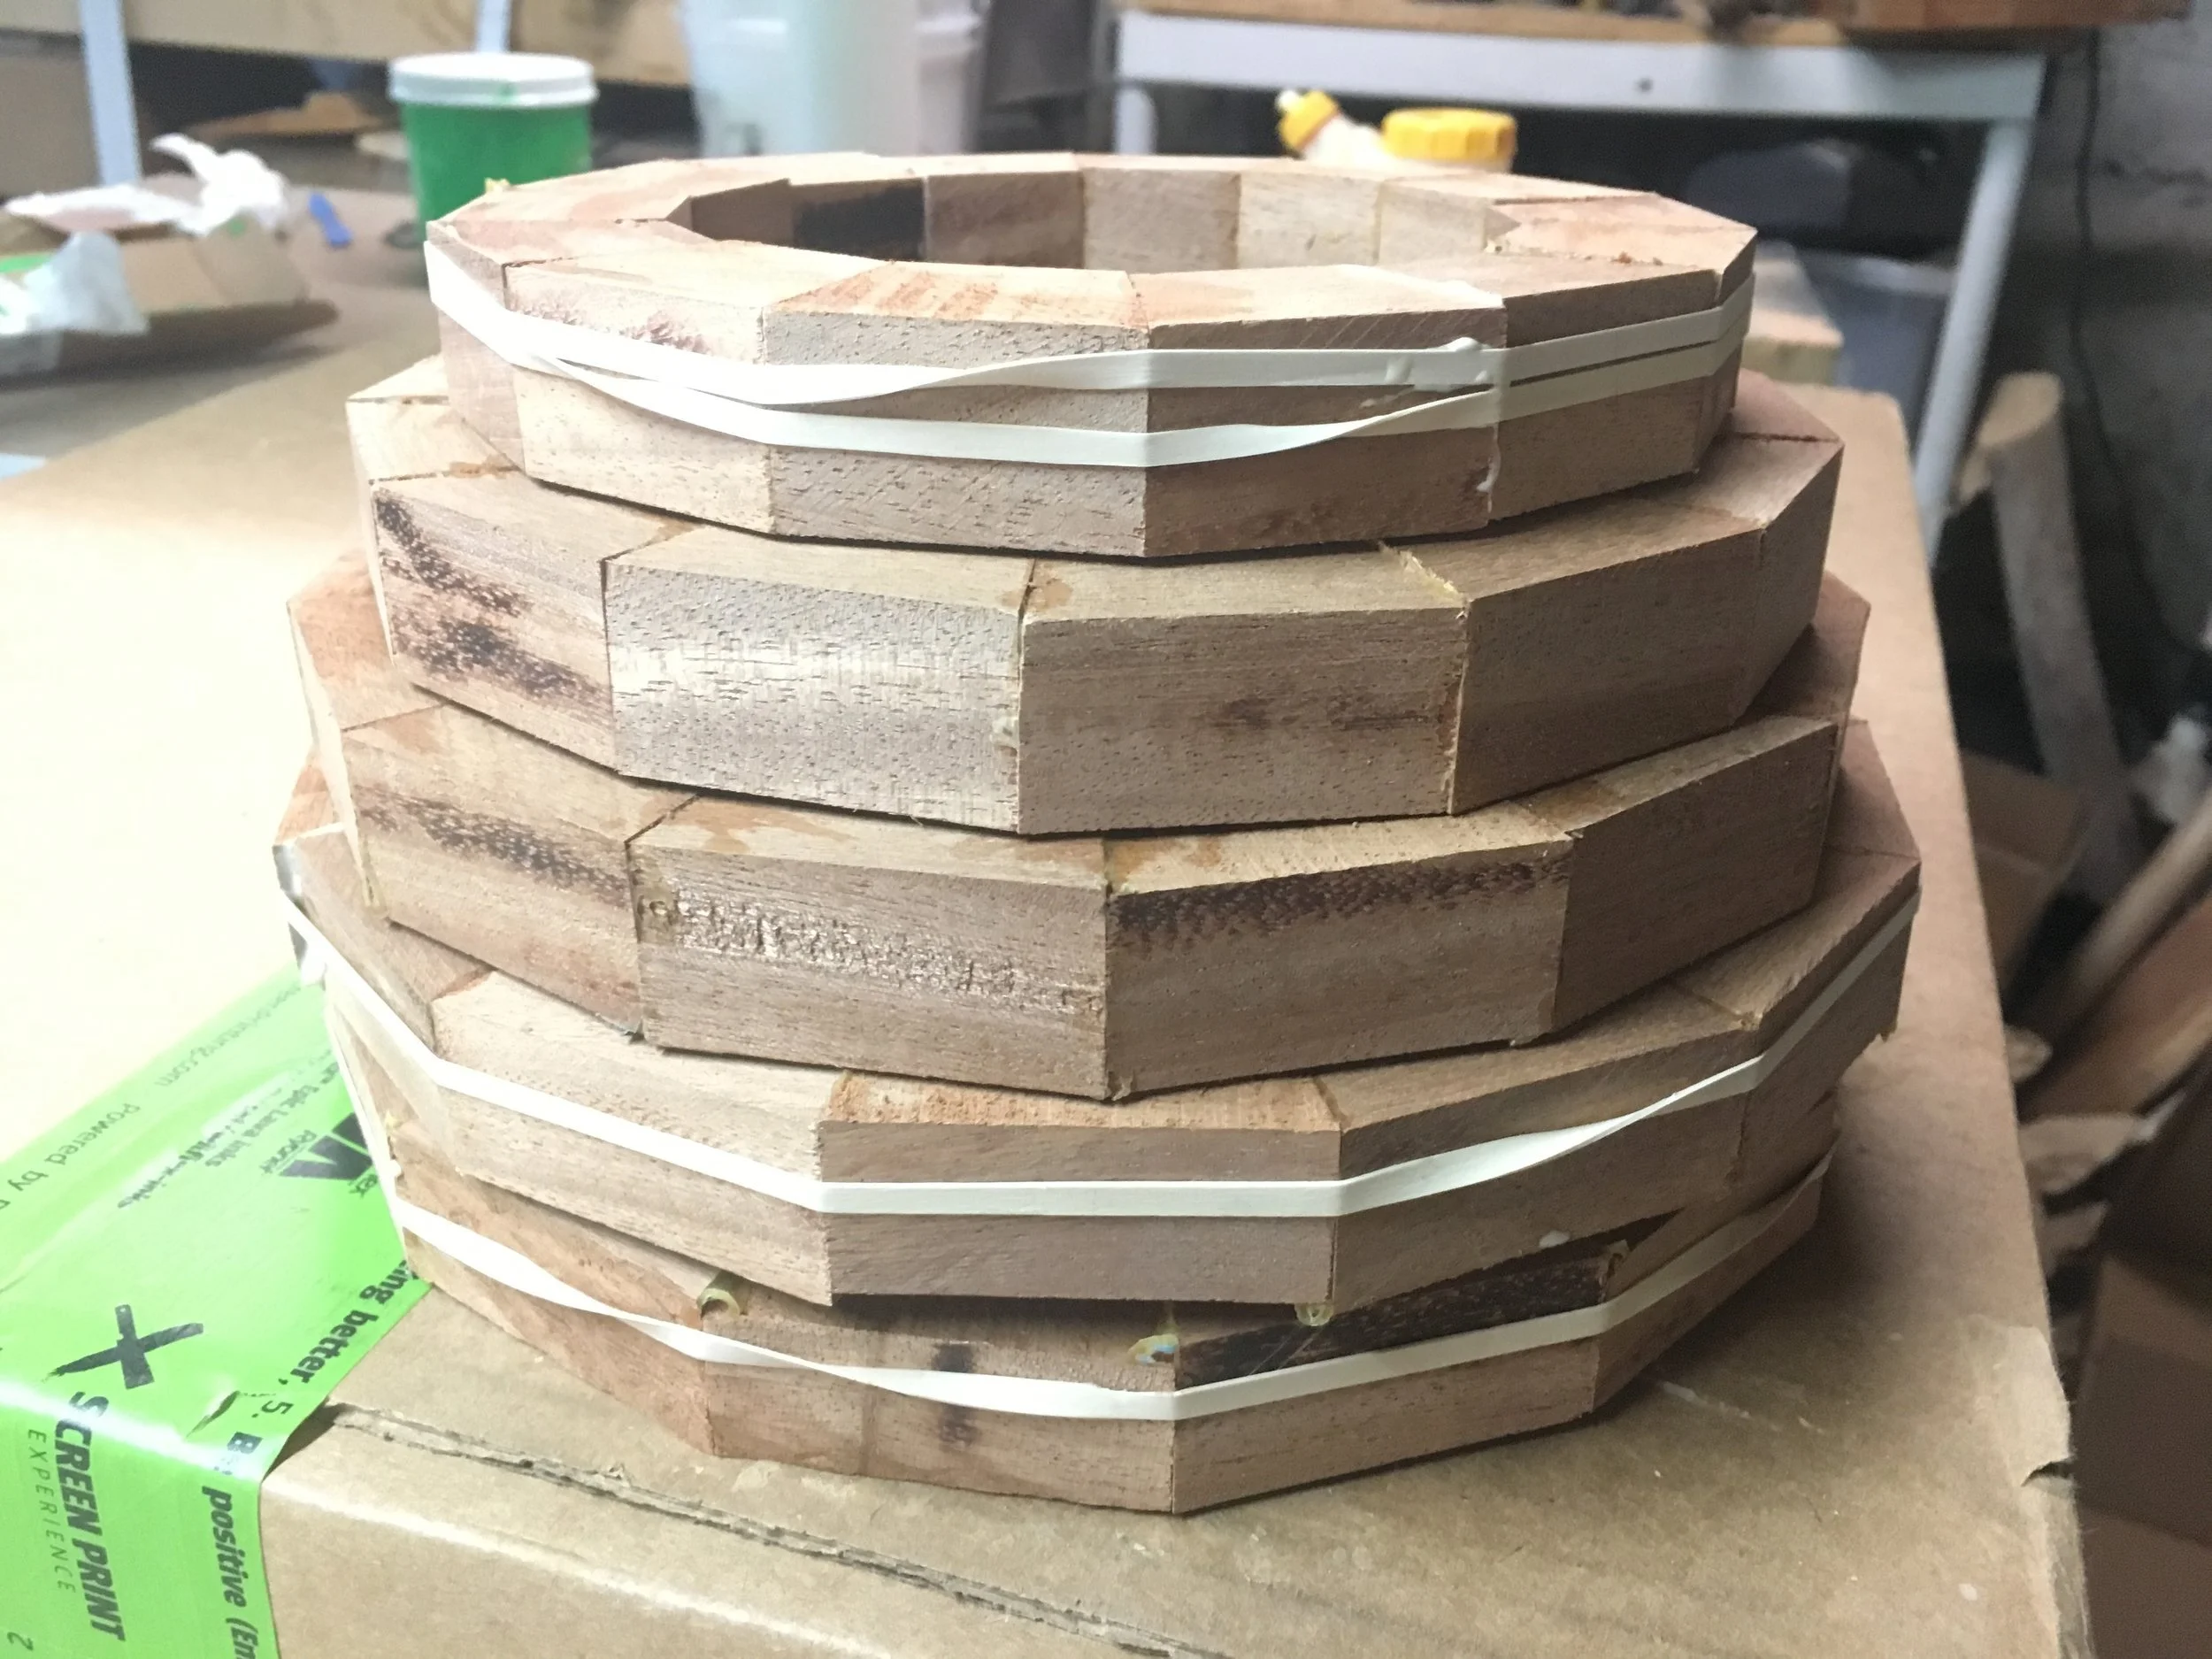
You can now glue the halves together to get full rings. I use rubber bands to clamp them. They’ve proven to have sufficient pressure for most average ring sizes.
But, we’re not done yet. Notice they don’t stack perfectly flat on top of each other. We’ve have to deal with that using a disc sander. If you don’t have one, you can cut two plywood circles, glue them together, and mount them to your lathe face plate. Then just sand both sides of each ring.
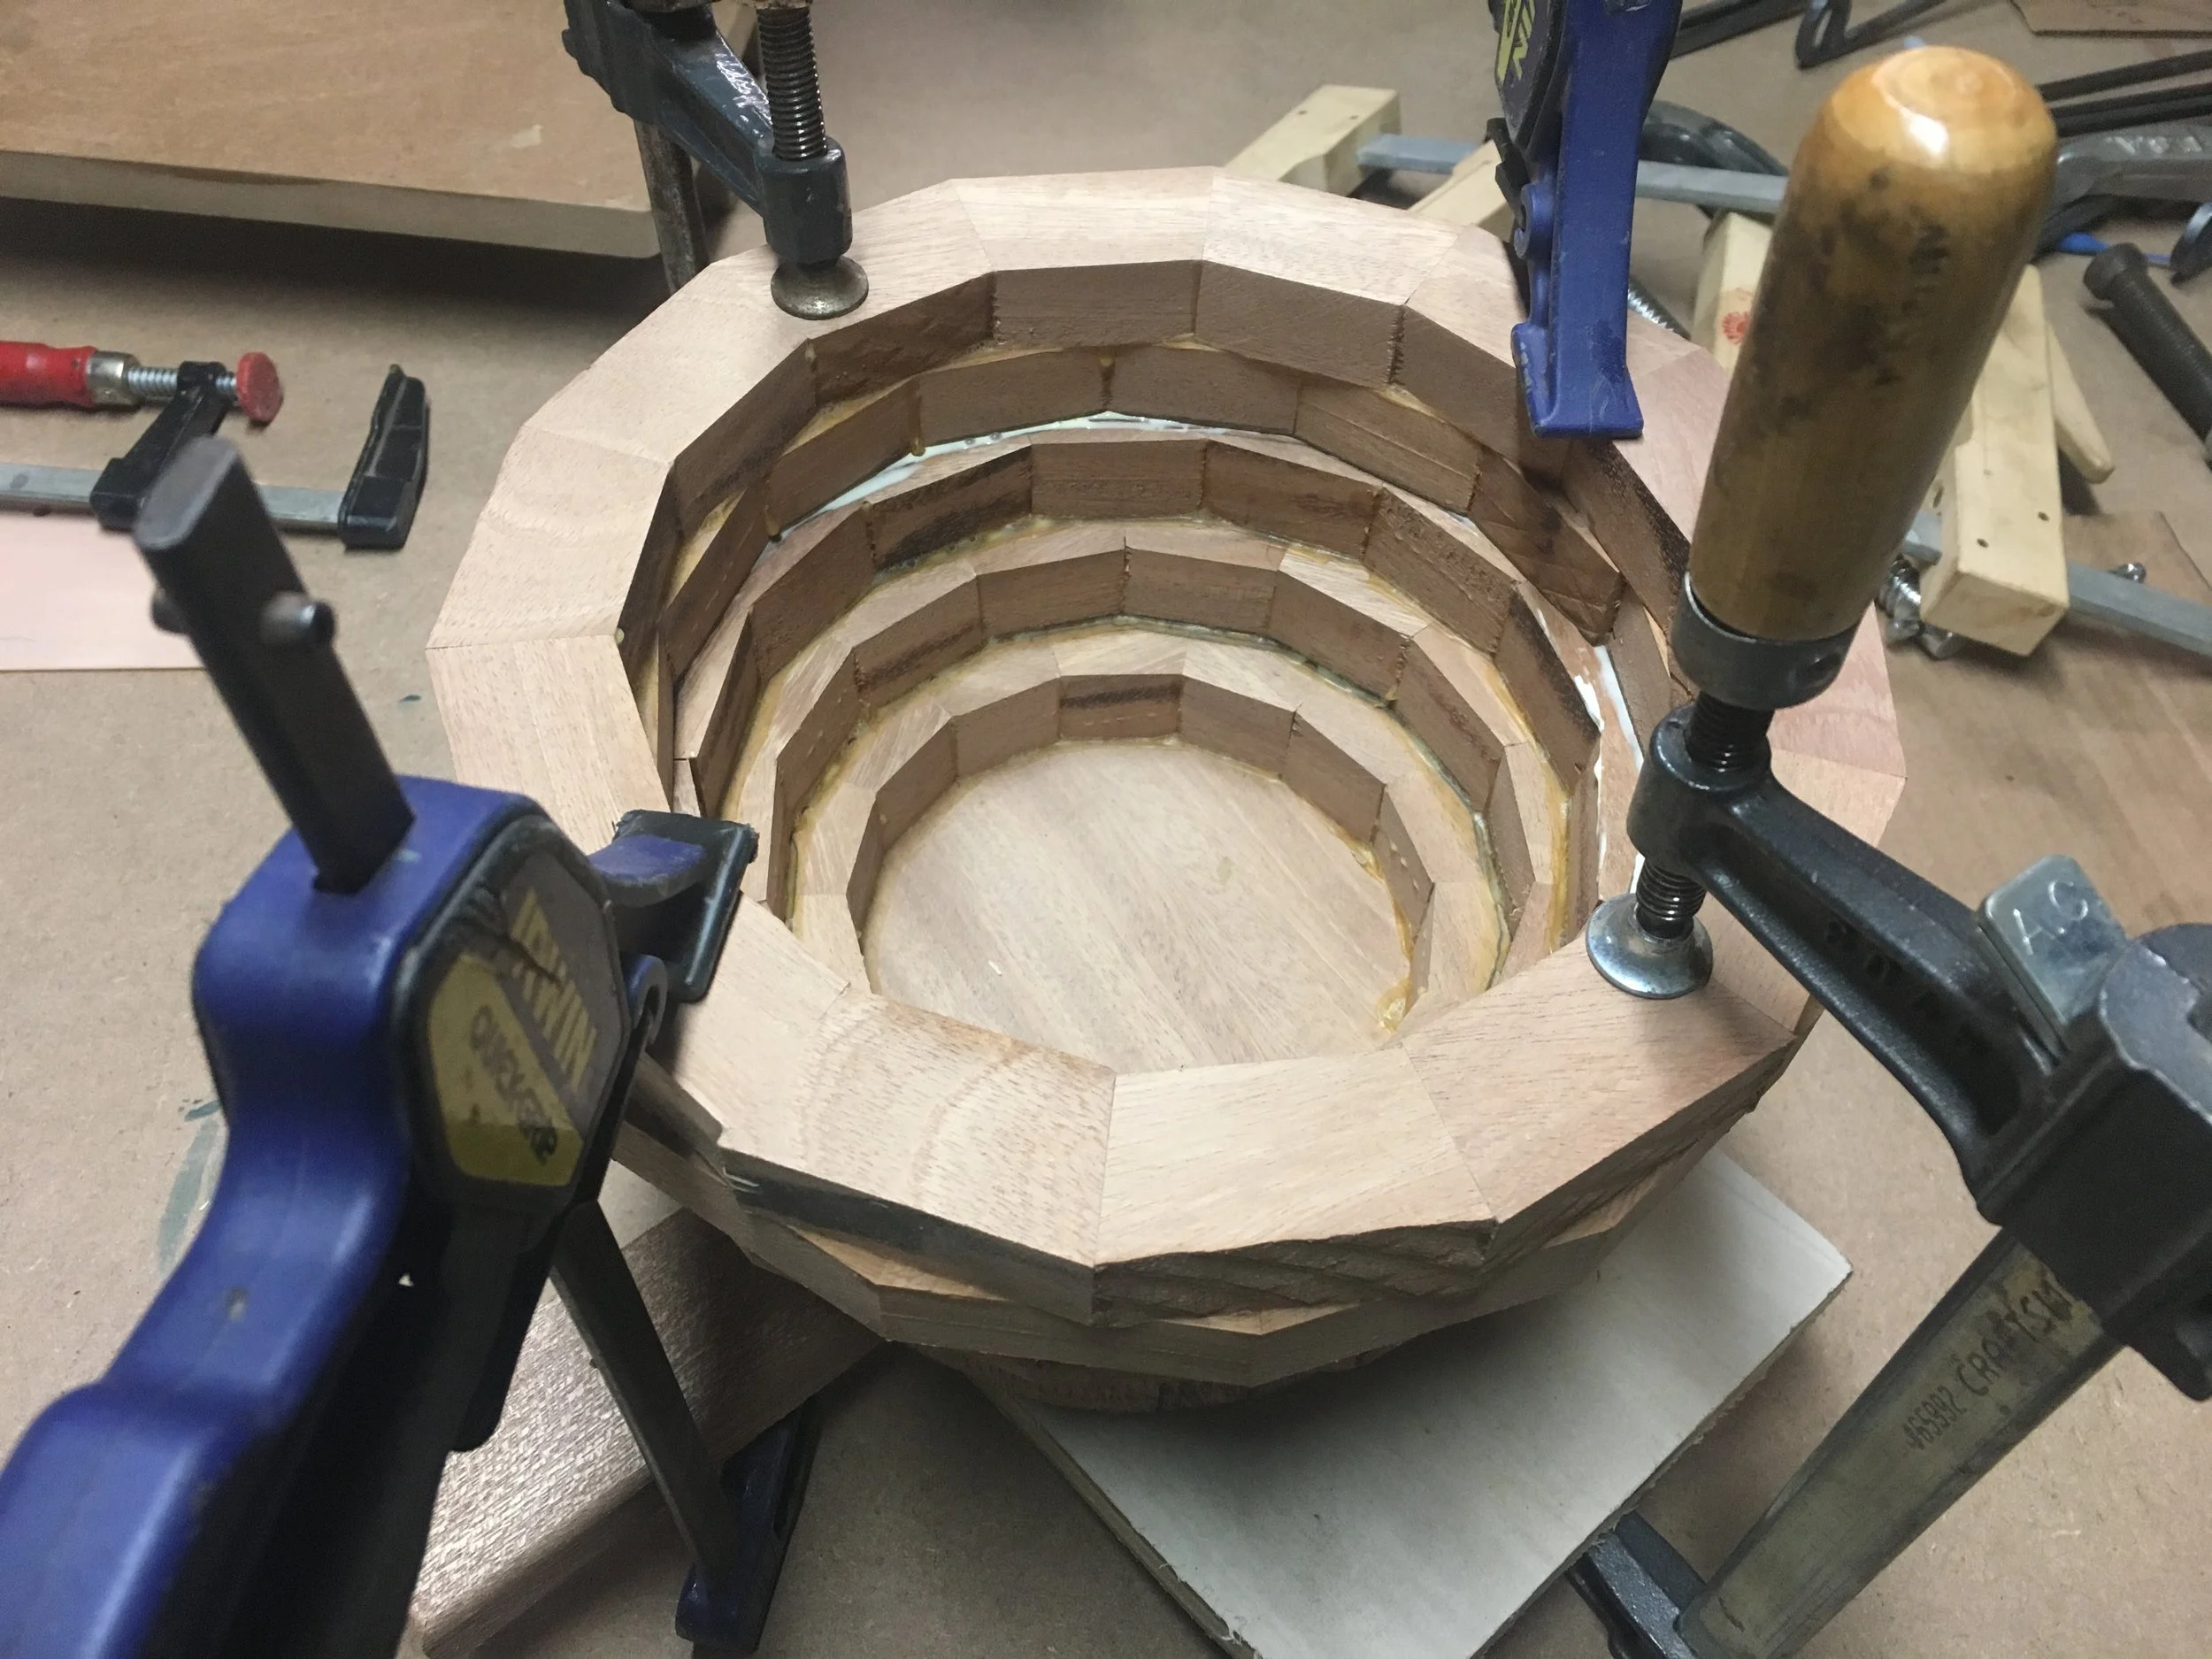
Once sanded, they all stack flat and can now be glued together. You might need to do only a couple rings at a time. Doing all at once makes them slide all around when you clamp them.
You can see I also glued a one-piece bottom on that I had cut into a circle on my band saw.
When you glue these up, make sure they’re all symmetrical or you’ll have wobbly nightmare when you mount it on the lathe.

Here, I’ve mounted the bowl on the lathe between the center. Objective one here is to turn a tenon on the bottom. That’s it for now. No shaping yet.
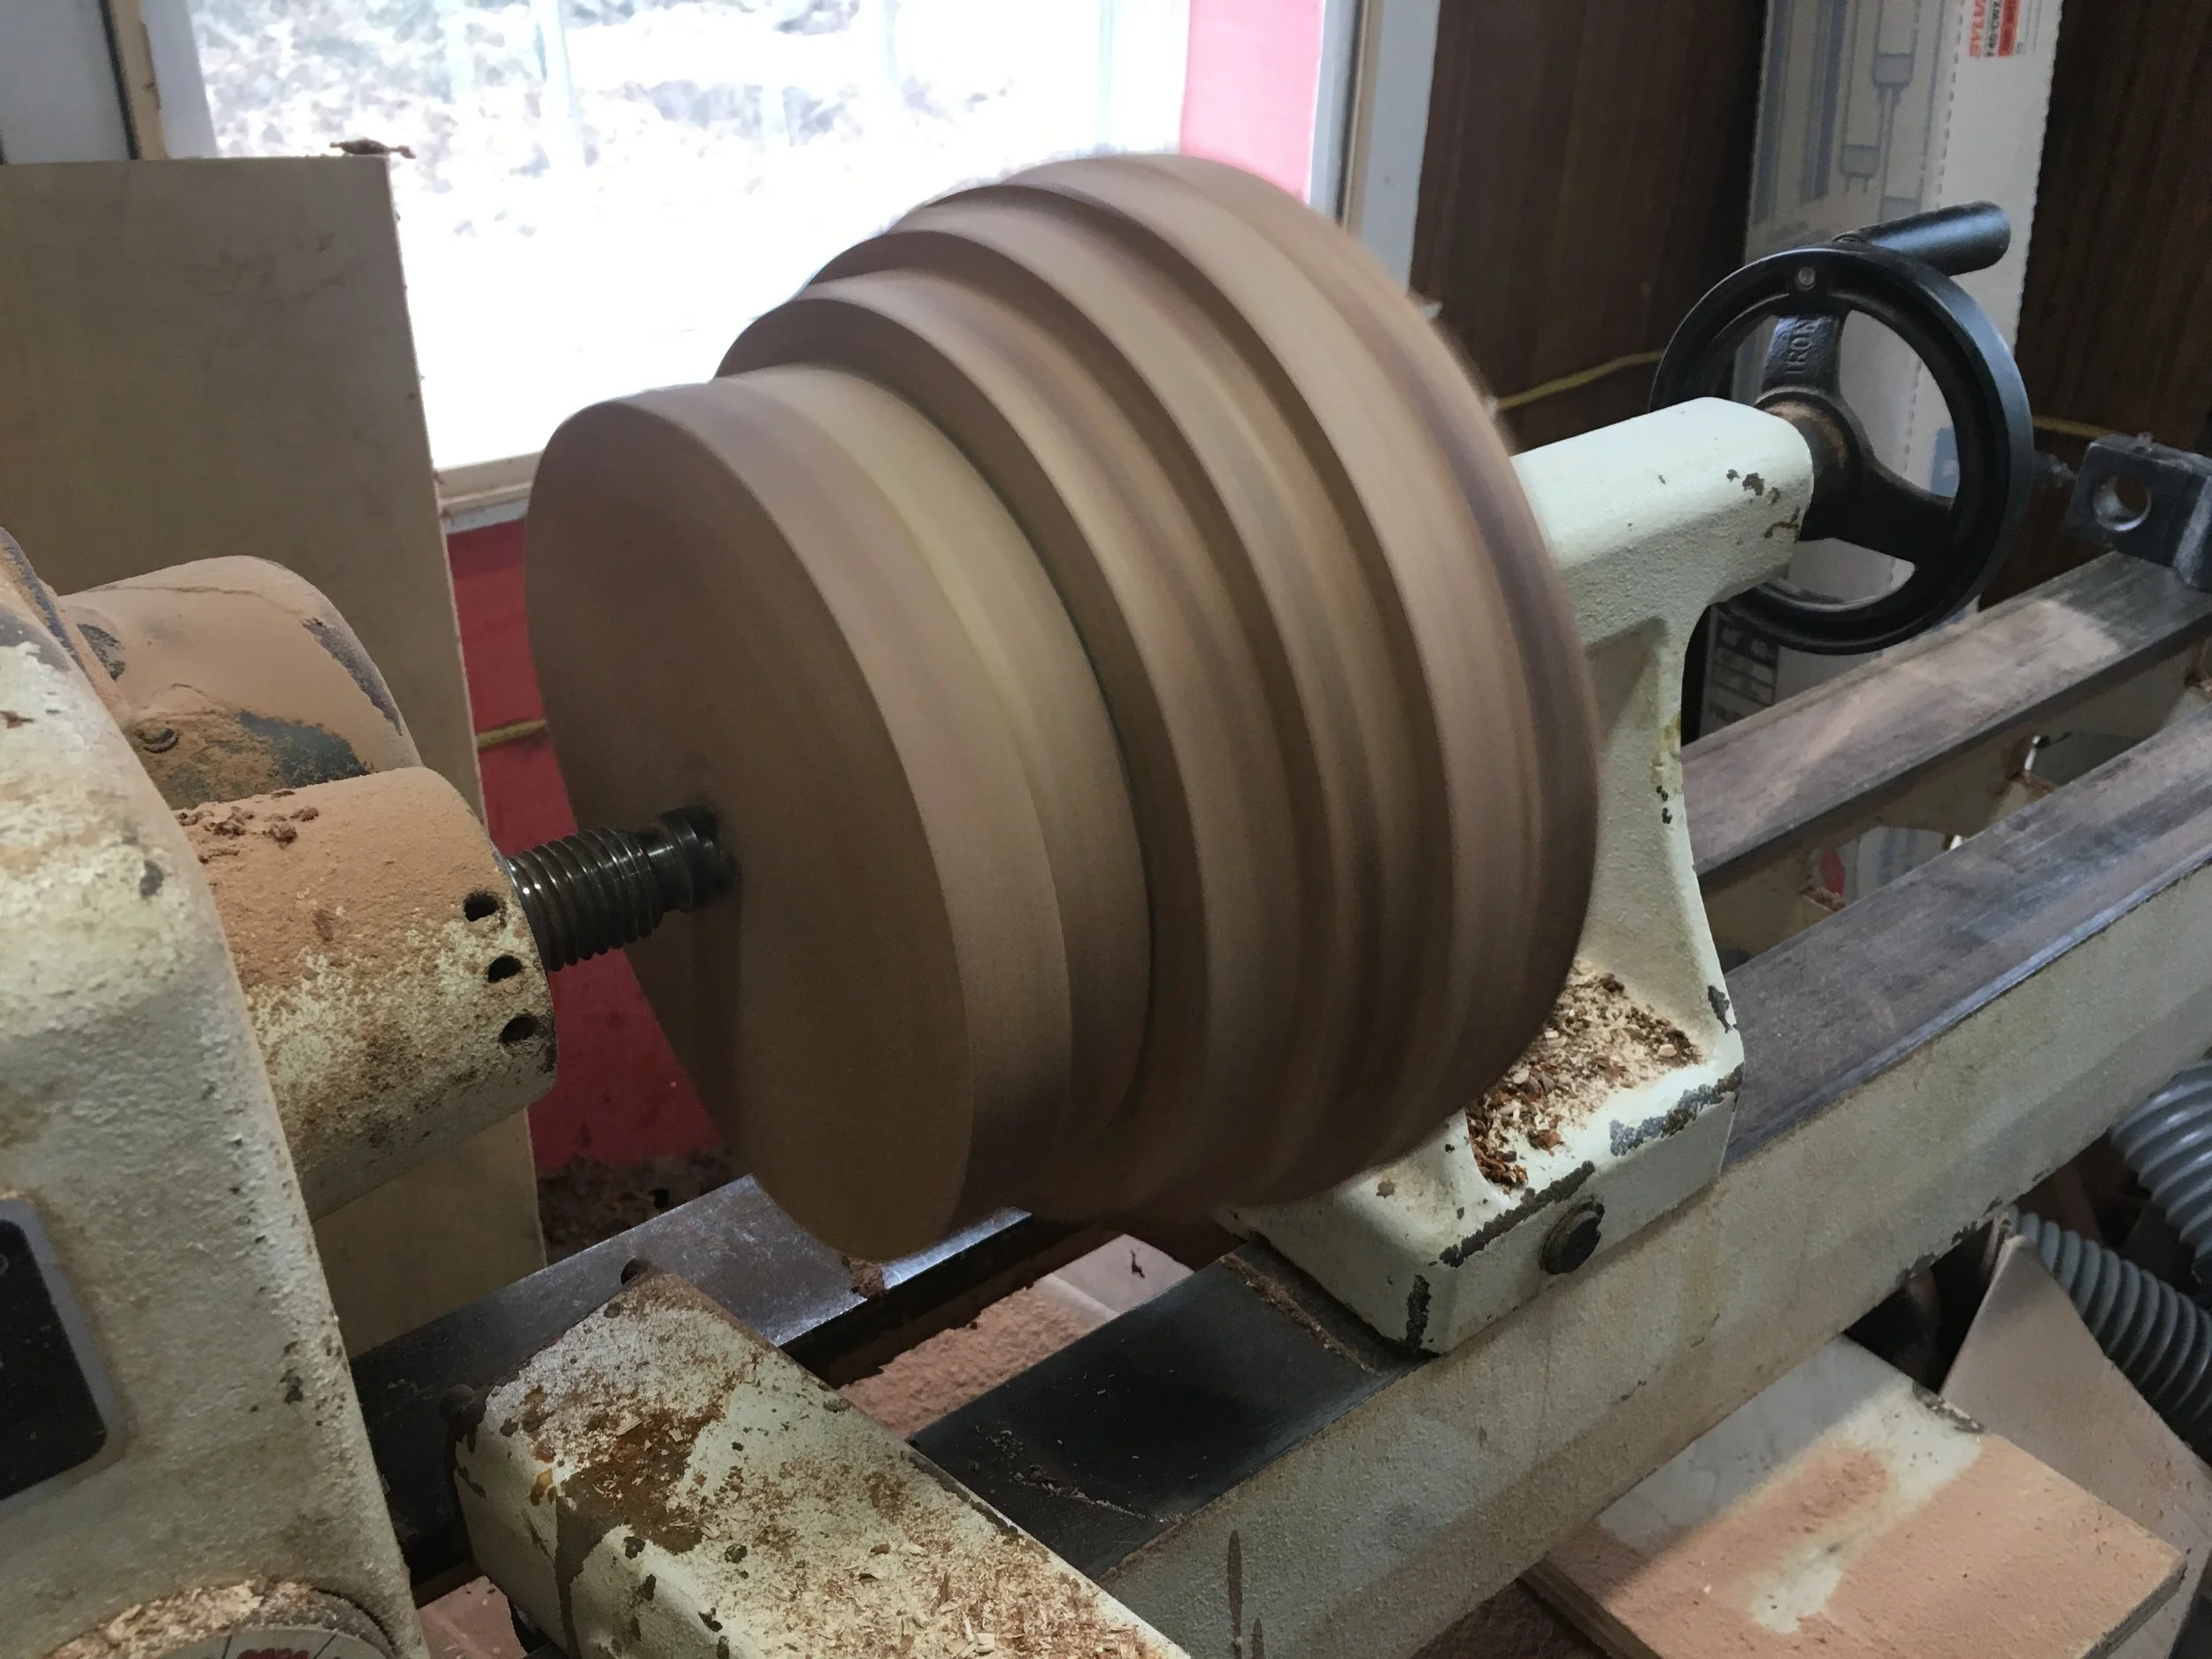
I turned the lathe on at the slowest RPM to make sure I didn’t have much wobble. The more centered you have everything, the less wobble. If there is a little wobble, it’s ok. As the gouge/chisel cuts it will make the bowl round.
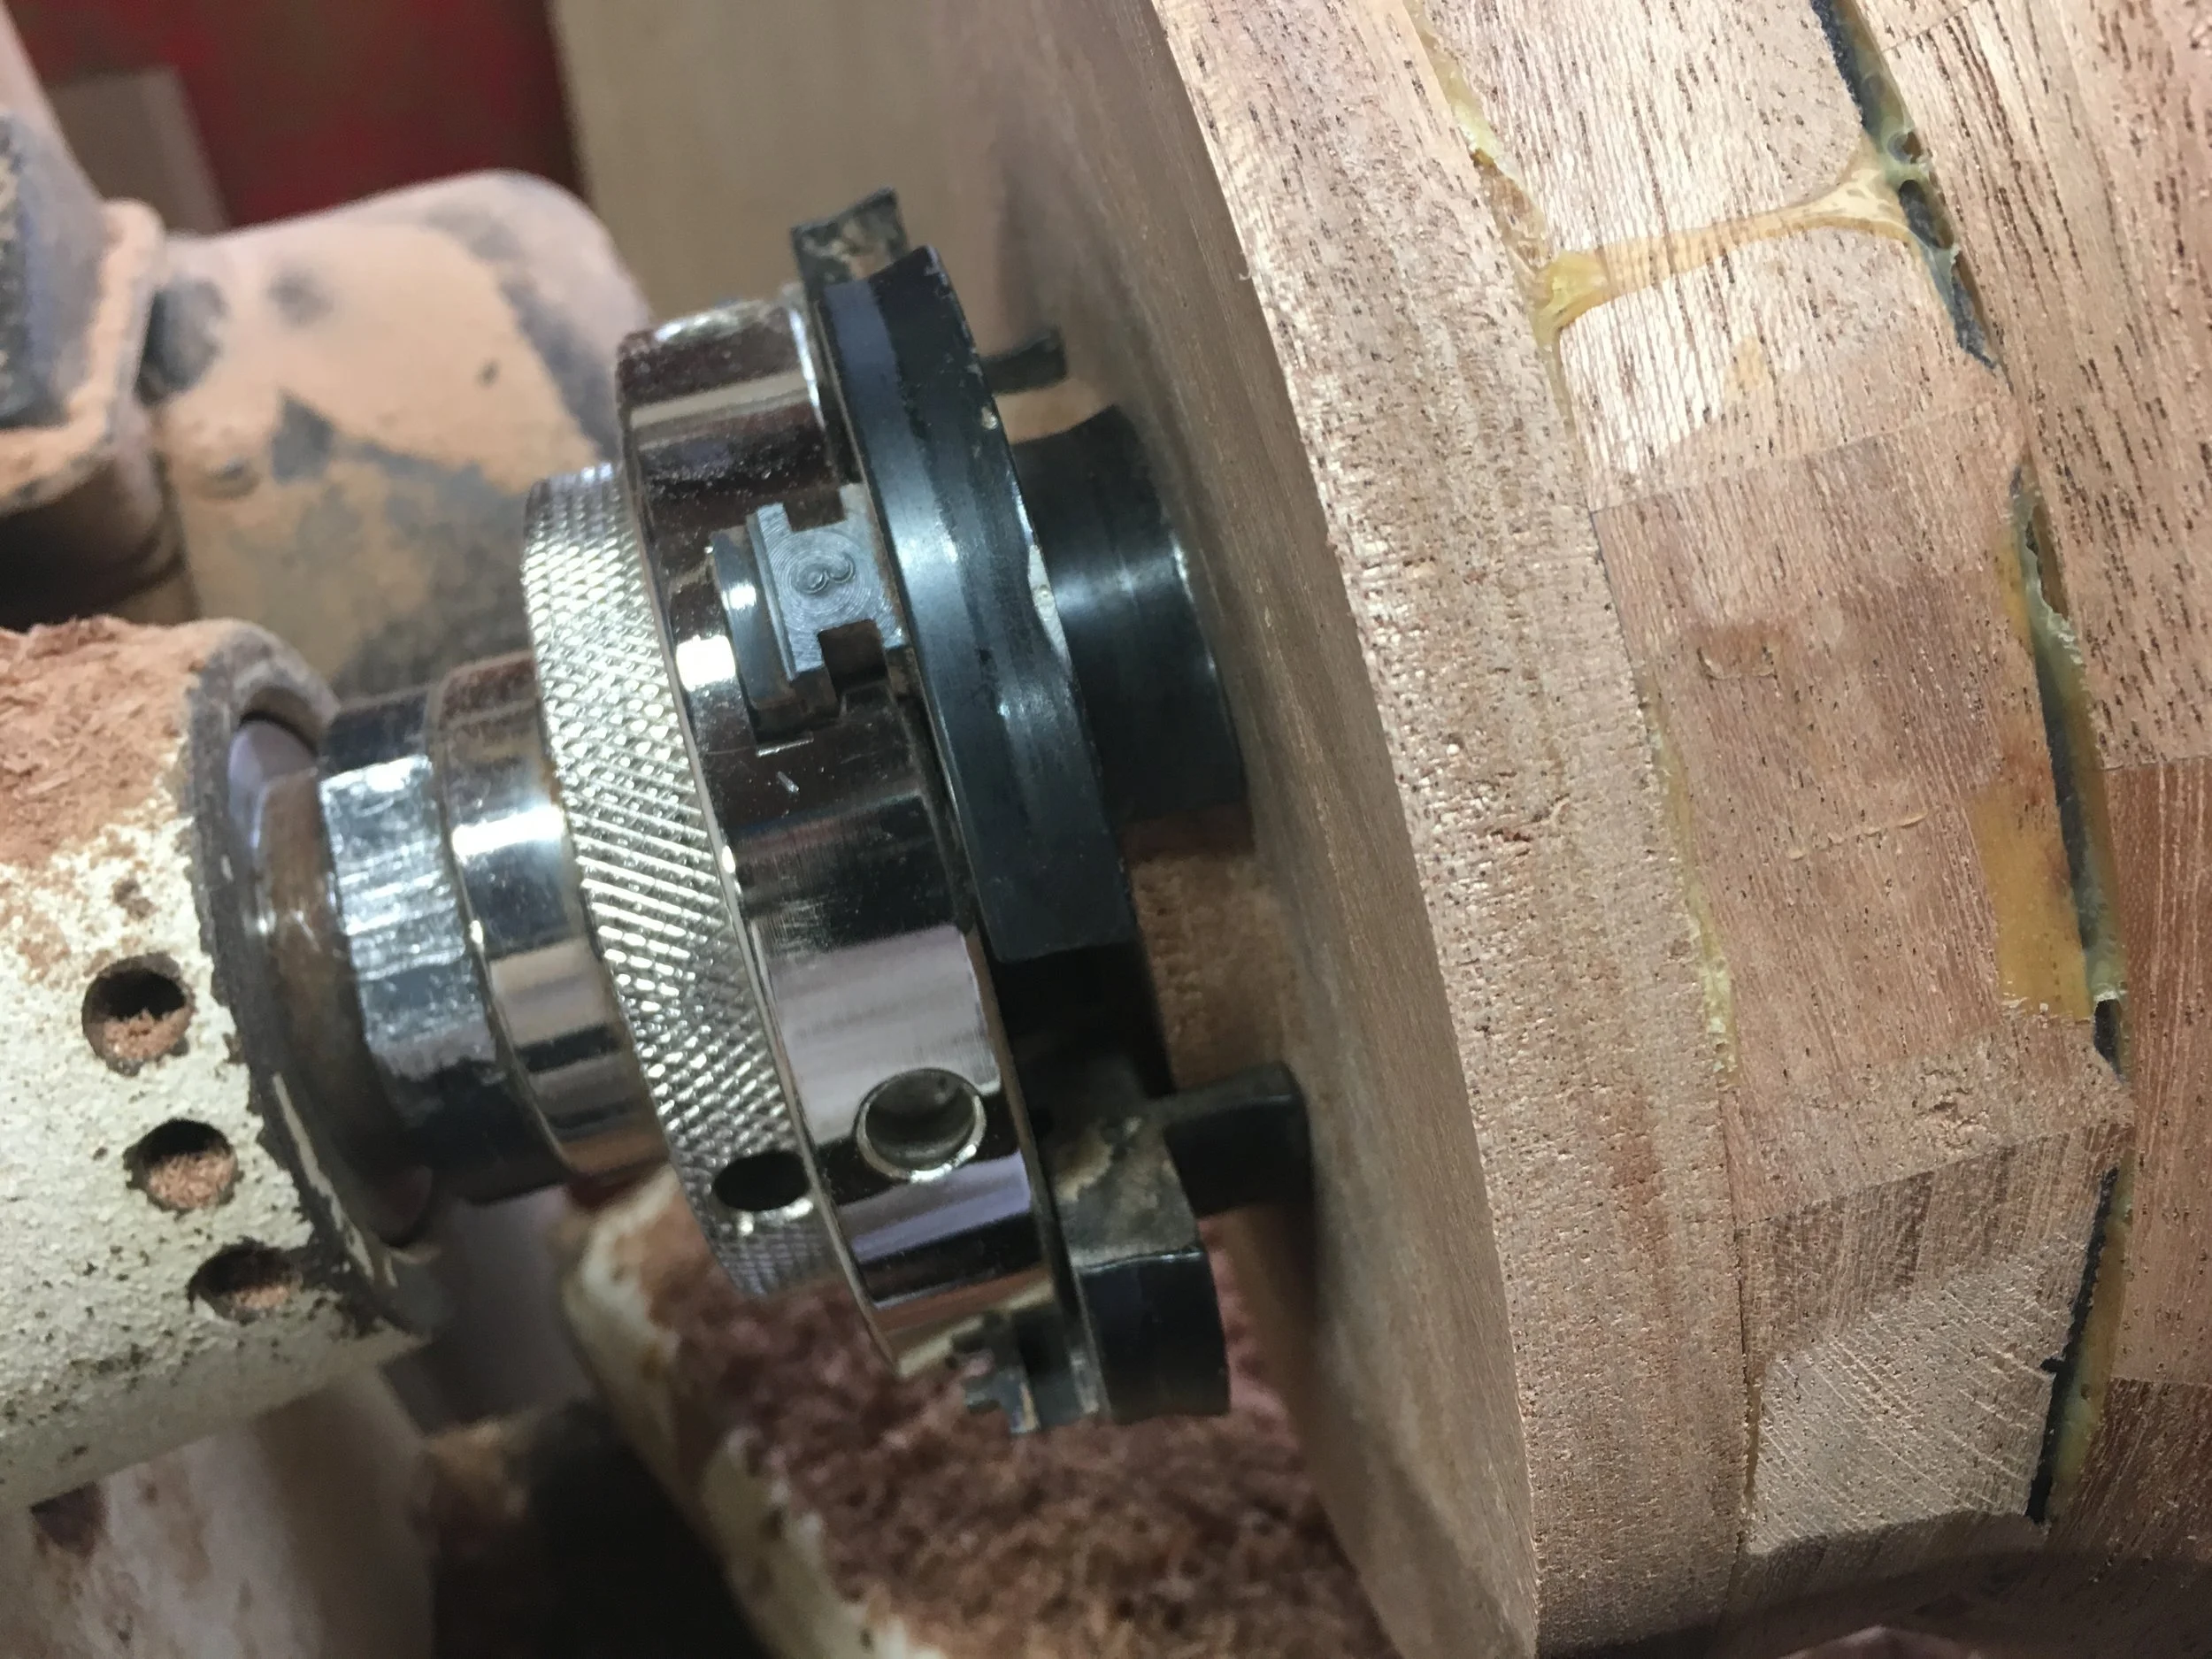
Once the tenon it turned on the bottom of the bowl, you can mount the bowl in the chuck. The chuck works like jaws to clamp onto the tenon so you can move the tailstock of the lathe and turn the inside of the bowl.
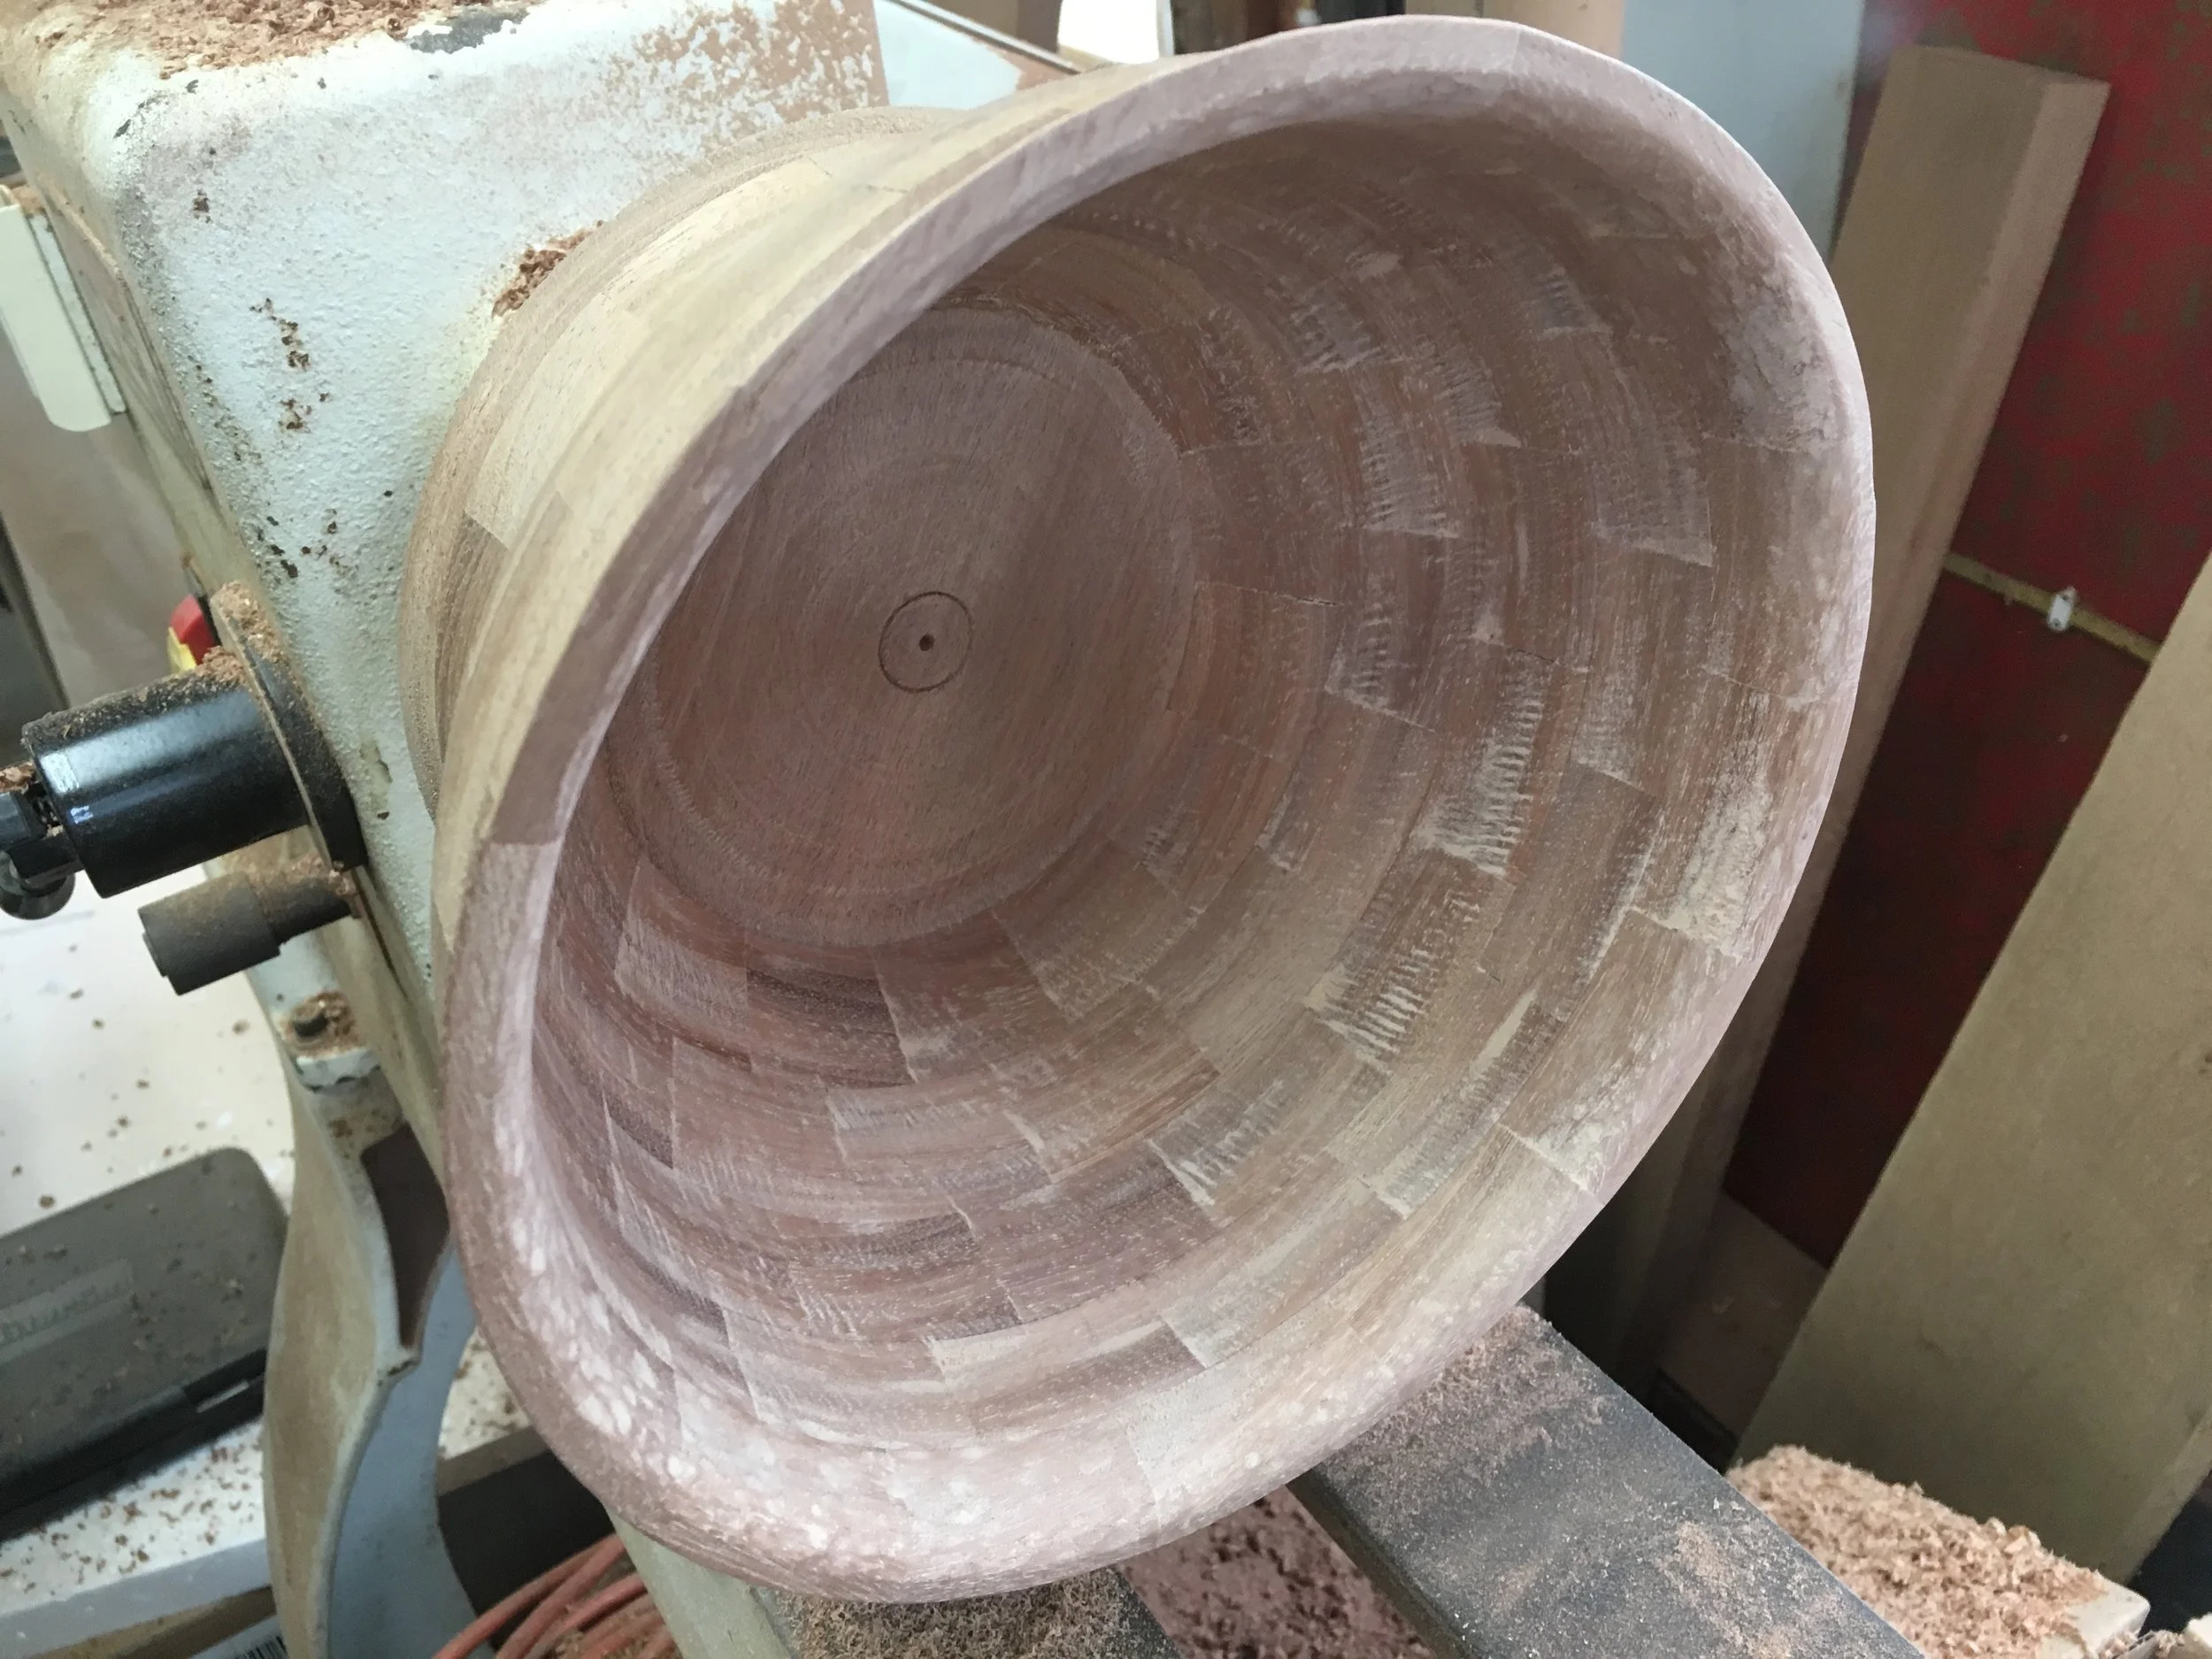
Here, I’ve rough turned the outside and the inside. The exact shape of the bowl isn’t really planned out, it just kind of takes shape. Make it up as you go.

After getting the bowl to it’s final shape, I sanded it down to 400 grit inside and out.
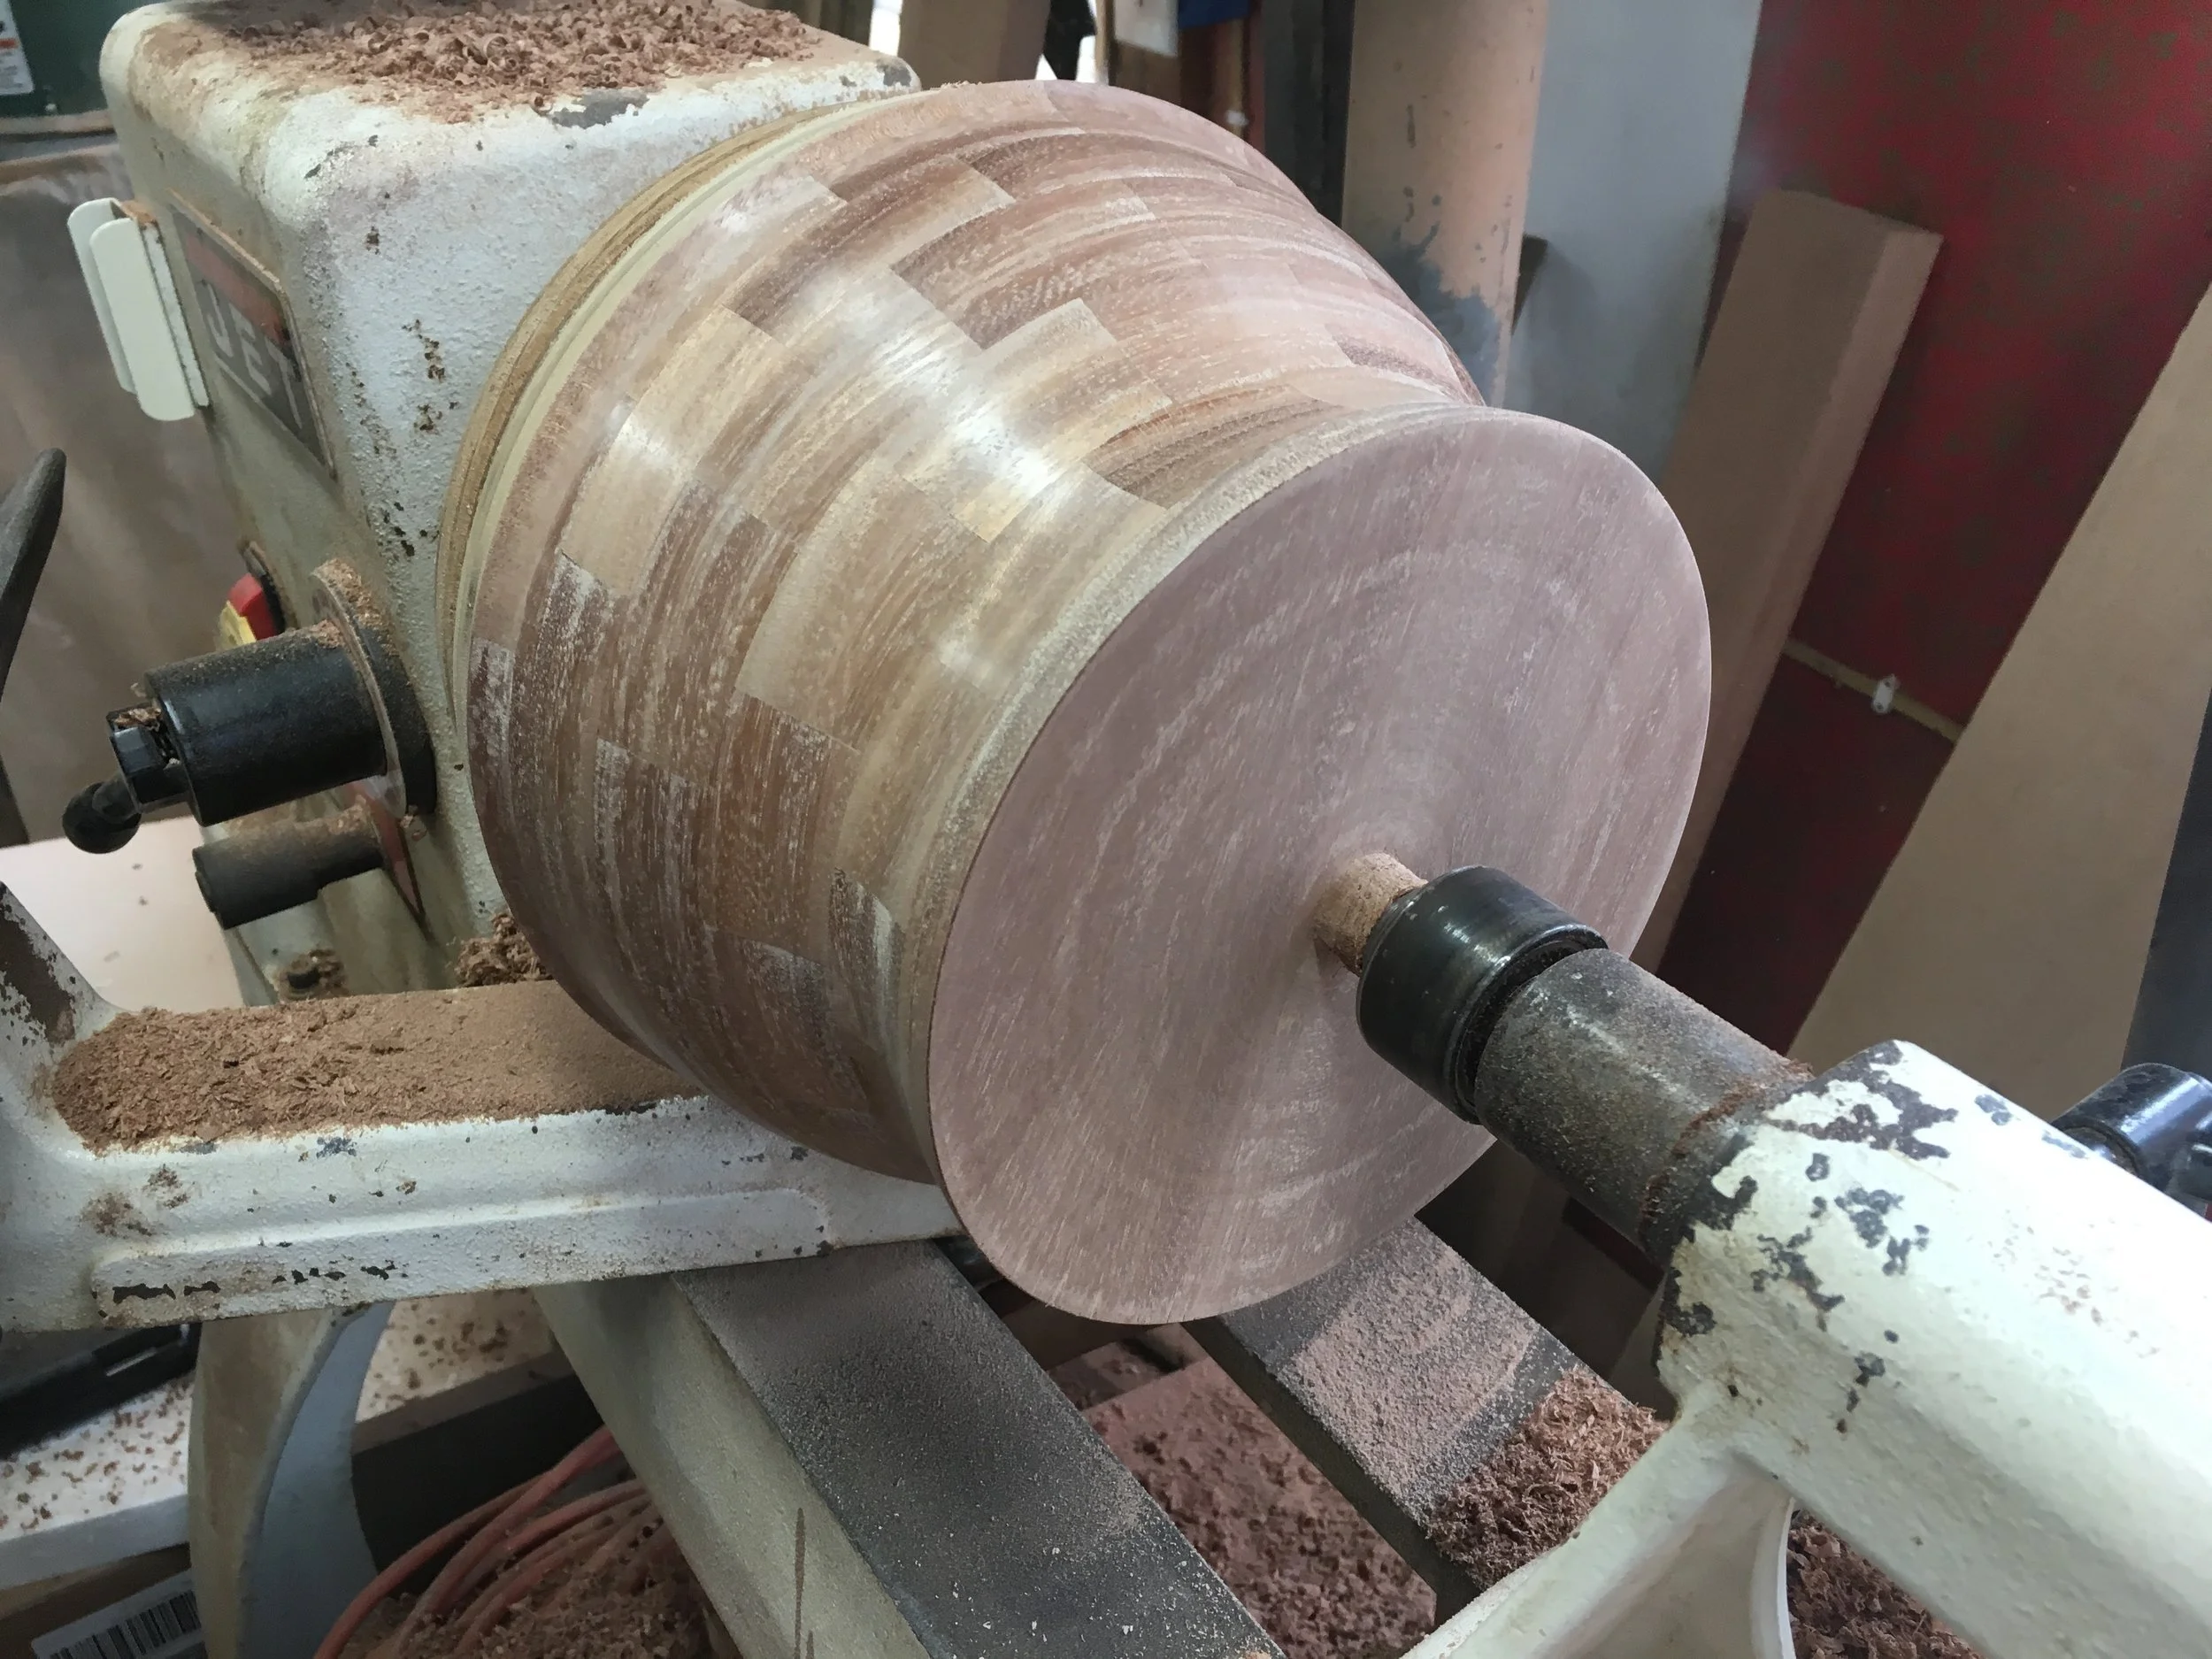
Then, I removed the bowl from the chuck and turned it around. I mounted the faceplate on the lathe used the tailstock to press the bowl up against the faceplate. This is technically called a “Jam-chuck" because you hold the bowl in place by jamming it between the headstock and tailstock.
With the bowl “jammed” I used a parting tool to make the tenon smaller and smaller until it was about the right size to be cut off with a flush cut handsaw.
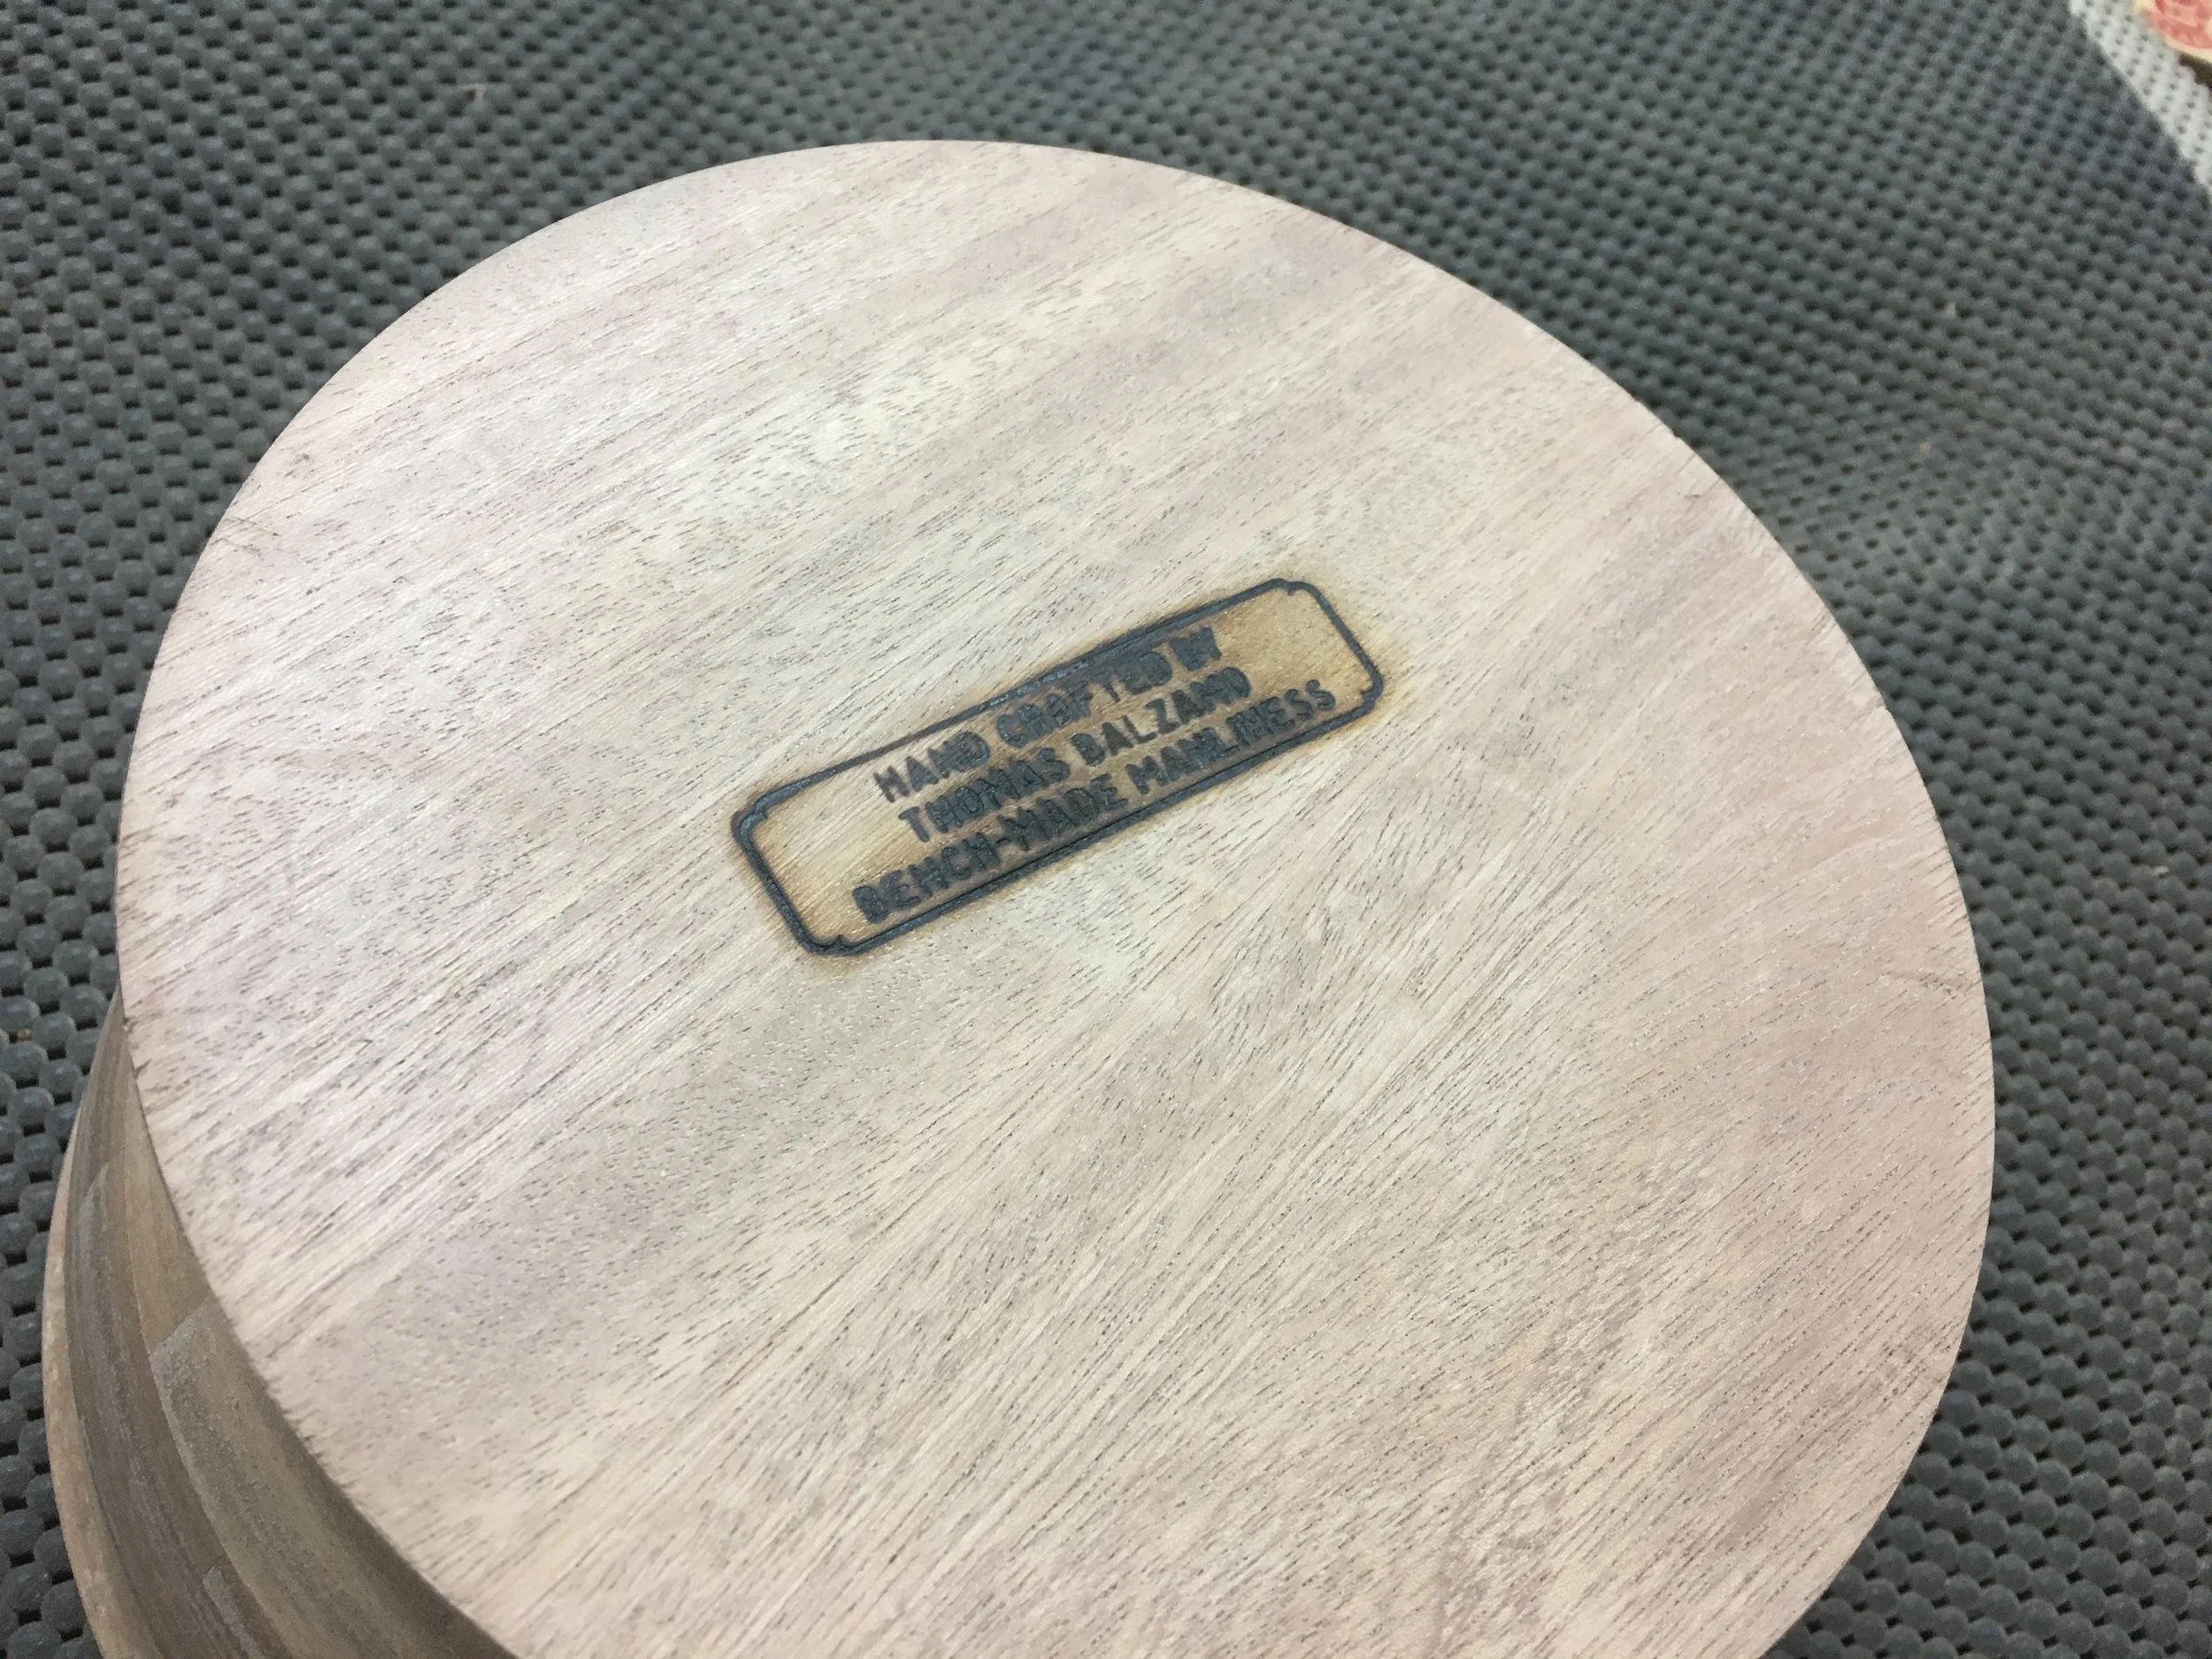
After cutting off what’s left of the tenon, I sanded the bottom by hand and cleaned off all the dust to get it ready for finish.
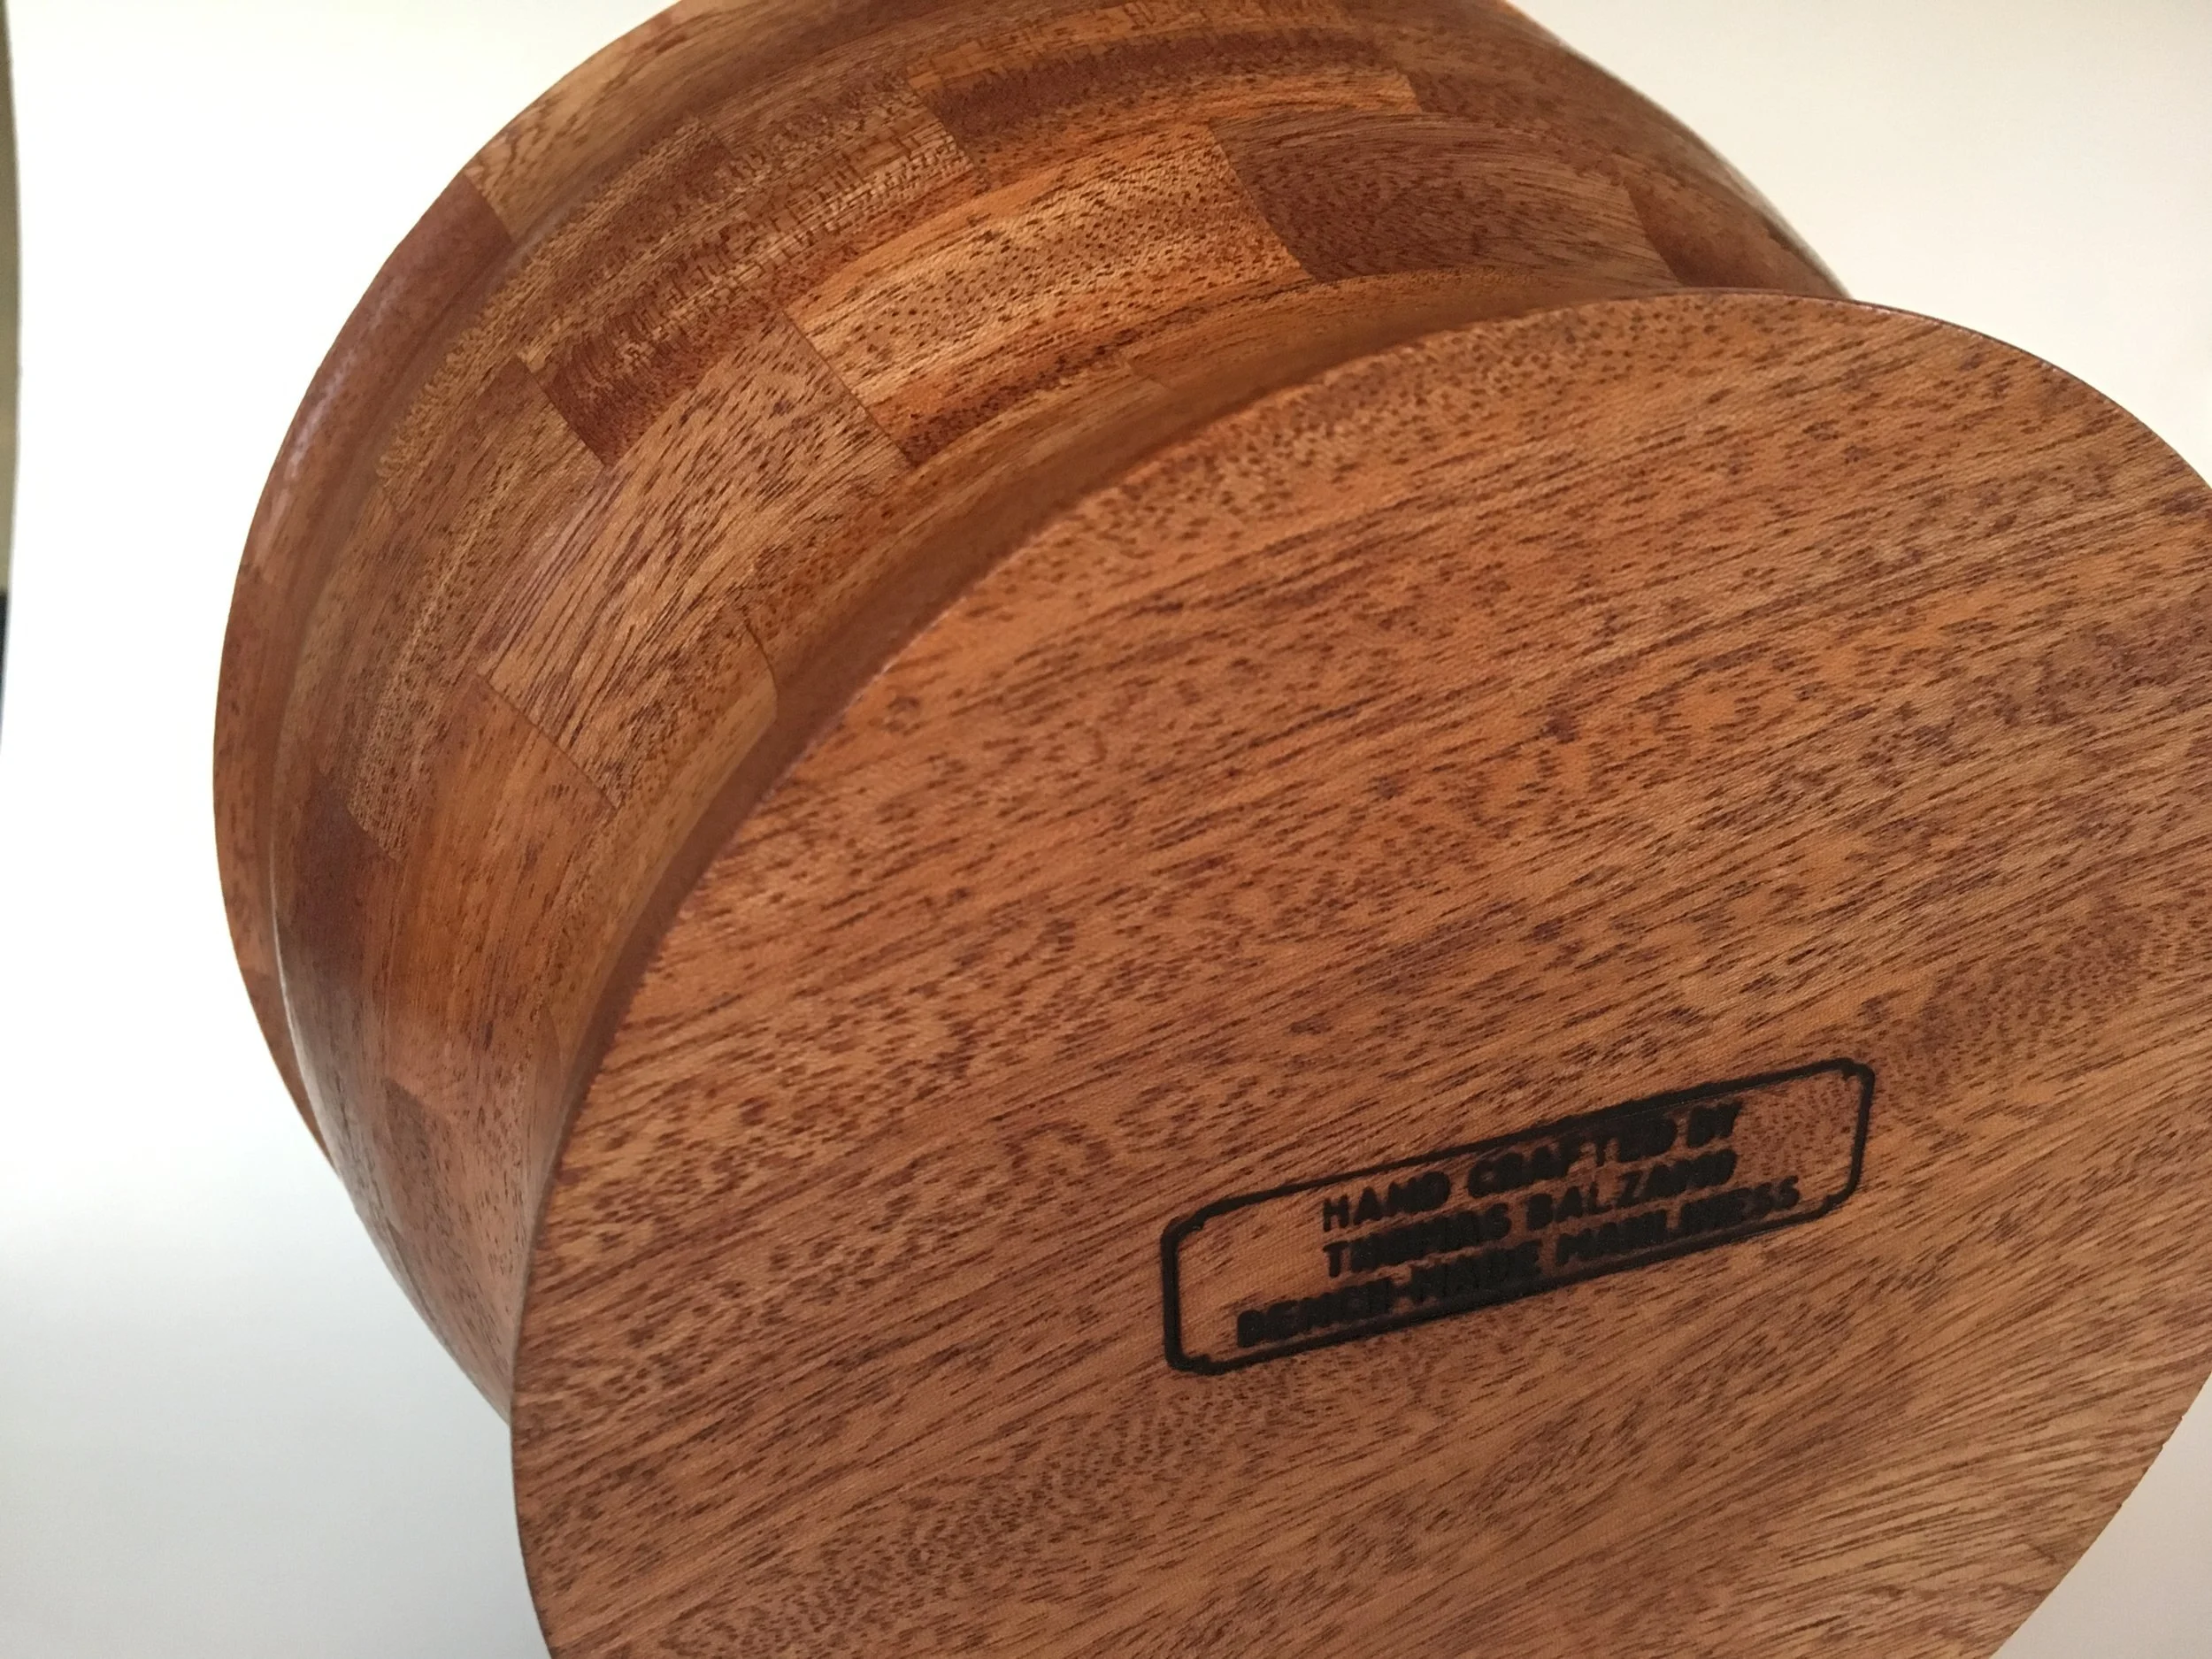
You then put your branding on the bottom, like I did here, if you have one. Or just sign it with a sharpie.
Then it’s time for finish. I used three coats of Waterlox, but if you want it to be food safe you can use something like Salad Bowl Finish by General Finishes. The WaterLox finish is a clear finish but it really brings out the natural tones of the Sapele wood.